As we approach Halloween, it is time to start thinking about horror cakes for parties. I have never been trick or treating but I love the opportunity to use face paint (which I may overdo ever so slightly) and the inspiration that Halloween gives to cooks is truly remarkable. From cute spiderweb biscuits to witches’ hat cupcakes, the wealth of Halloween themed food out there is incredibly vast. The cake which inspired this recipe was created by Yolanda at How To Cake It and I have been saying for about three years that I would recreate it for. Finally, I have.
Hidden beneath the terrifying exterior is a delicious red velvet cake which can, of course, be baked and eaten without any of the extra work required to scare it up. Although most red velvet cakes are now coloured with red food colouring, the original colour was completely natural. The cocoa powder most of us use has undergone the Dutch process which increases the pH of the cocoa (making it less acidic), darkens it, and rounds out the flavour. The raw cocoa is very high in an indicator known as anthocyanin (check out more about that in my purple sweet potato soup recipe) which turns red when exposed to acid – such as the vinegar added to a red velvet cake. This natural indicator was the original dye used to colour these cakes. The addition of buttermilk and replacement of butter with oil ensures that the cake is super moist although the softer crumb can often be harder to work with than a standard sponge cake.
The title of velvet was introduced when the cake was created to tell customers that the cake was softer that the cakes they were used to. It was created during the Victorian era and was iced not with cream cheese frosting but with ermine icing. This involved making a roux as the base for the icing which helped to stabilise it – especially in warm temperatures as the icing won’t melt as fast as either cream cheese or standard buttercream in the summer sun. Boiled beetroot juice was added during the second world war as this gave a far more intense red colour to the cake and beetroots grew well in England so were in good supply.
Somewhere during the decoration of a brain cake, there is a point at which the cake starts becoming horrifying to look at. It is a bizarre experience as you know that it is still a cake but for most of us (who haven’t seen a brain) the realism of this cake is decidedly unnerving. It would make a great food to bring to a Halloween party – or a viewing of The Silence of the Lambs. You could also use it to teach people about different areas of the brain if you are that way inclined. Whatever you do with it, you are sure to be remembered by all those who eat this cake. I had the misfortune of taking this cake on the train and I received (understandably) many weird looks from people who were standing around me.
I hope you enjoy making this as much as I did and that any Halloween party you take this to will remember you forever.
Red Velvet Brain Cake
Serves: 20
Prep time: 30 minutes (only about 15 minutes if you are making the classic red velvet cake, not the brain)
Cook time: 20-30 minutes
Decoration time: 1 hour (for the brain cake)
Cooling and resting time: 1 hour
500g plain flour
2 tbsp cocoa powder
4 tsp baking powder
2 tsp bicarbonate of soda
550g light brown sugar
1 tsp salt
4 eggs
300ml vegetable oil
1 tbsp vanilla extract
2 tsp white vinegar
200ml plain yoghurt
200ml water
Concentrated red food gel (you must use the gel as liquid colour isn’t enough. I used around 20g for this cake)
Cream Cheese icing:
125g butter
180g (one tub) soft cream cheese
400g sifted icing sugar
1 tsp vanilla extract
1 pinch salt
Decoration
500g marshmallows
900g sifted icing sugar
2 tbsp water
Yellow and red food colouring
1 jar of seedless raspberry jam (you can use normal jam and force it through a sieve)
4 tbsp water
Preheat the oven to gas mark 4
Line two large swiss roll tins with baking parchment – or if you are doing a traditional red velvet cake, four eight-inch round tins.
Sift together the flour and cocoa into a large bowl.
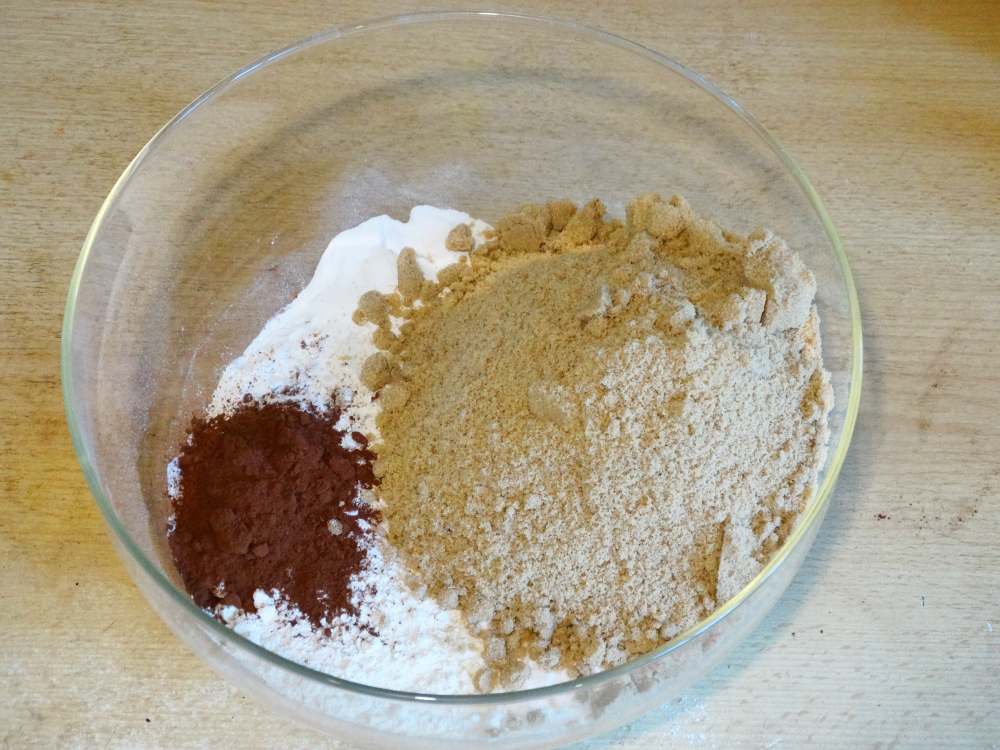
Stir through the rest of the dry ingredients
Mix together the wet ingredients in a separate bowl.
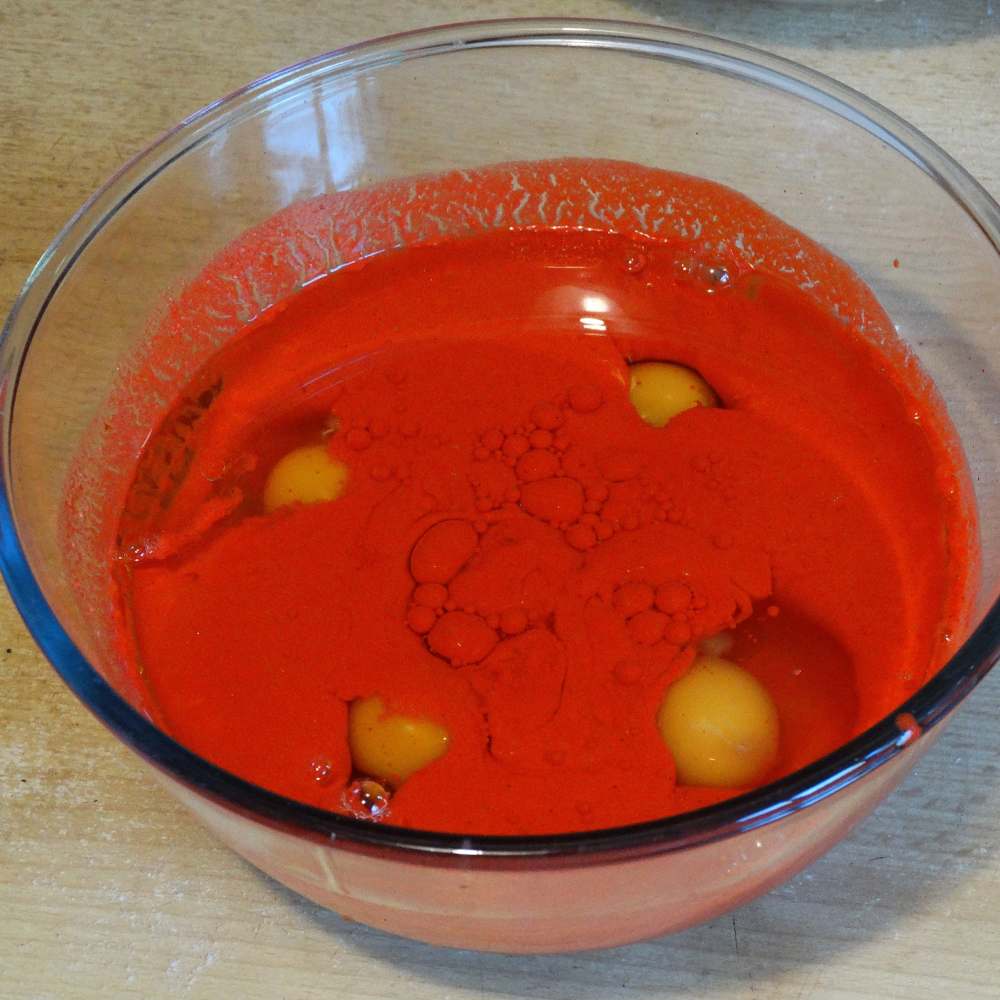
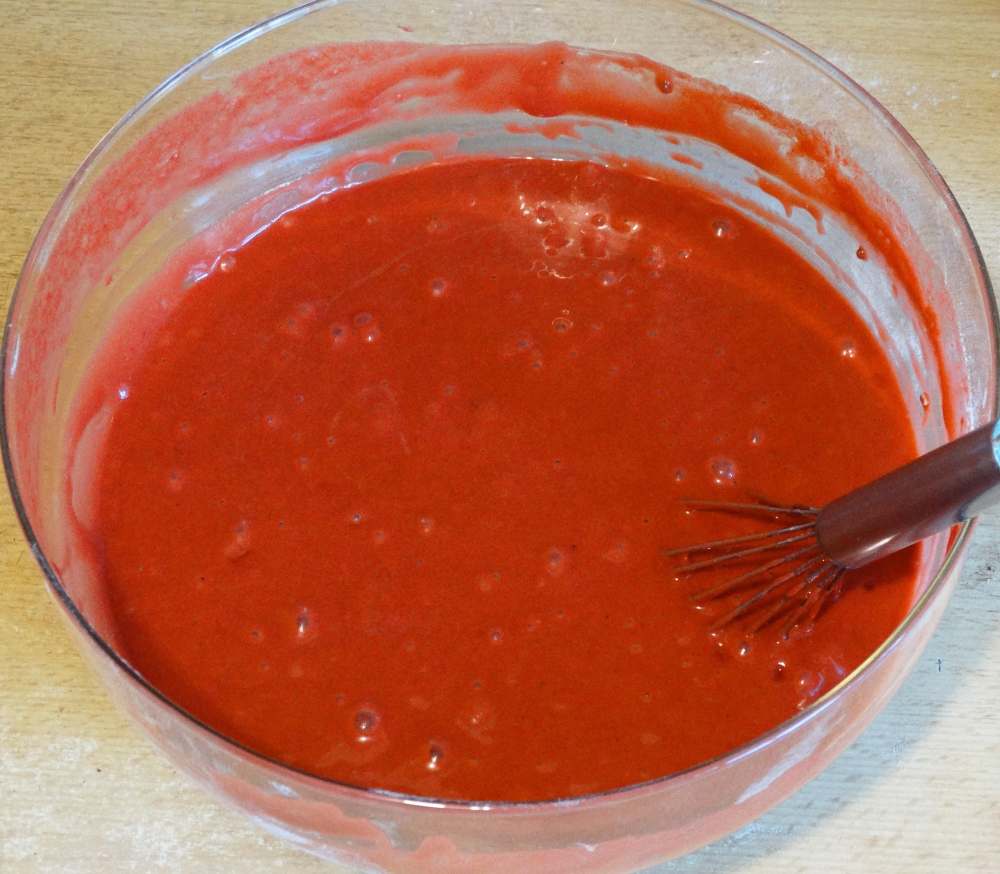
Pour the wet ingredients into the dry ones and beat the cake mix until it is smooth.
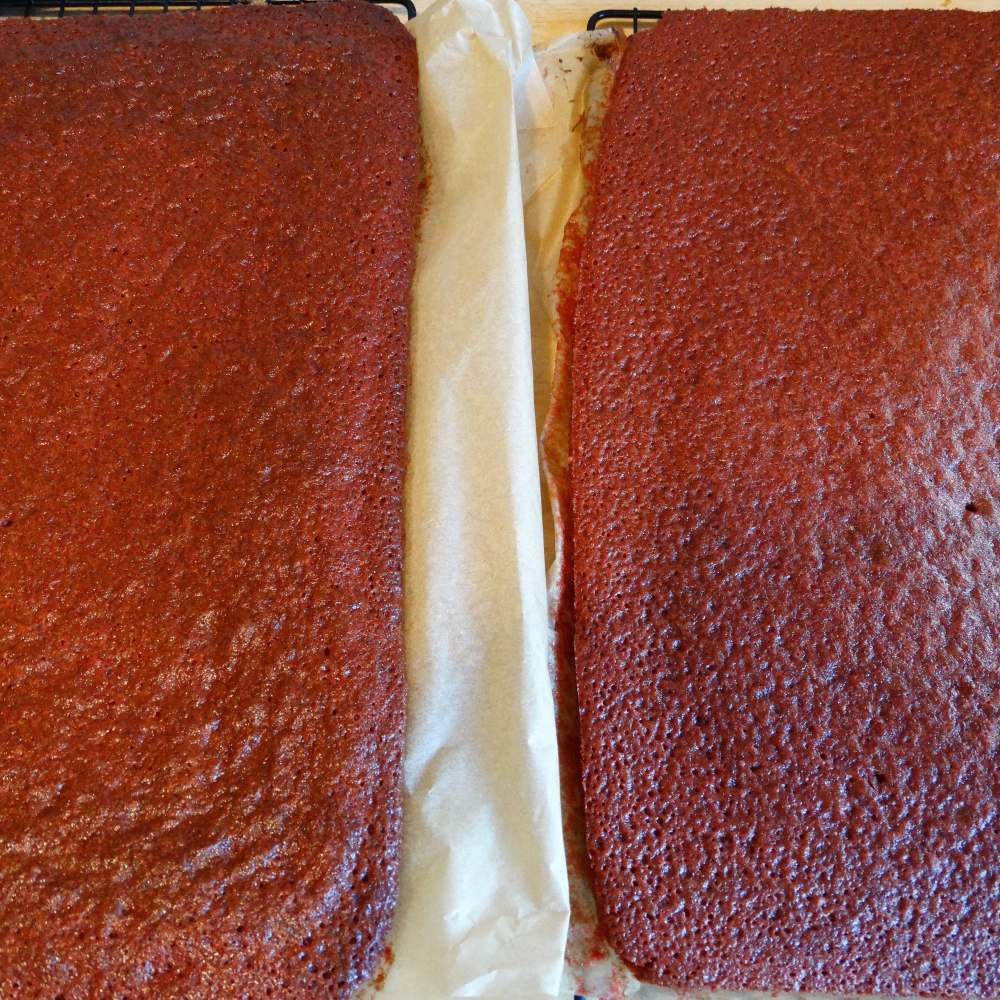
Divide the cake mixture between the tins and bake for around 20 minutes for the large flat cakes or around 25-30 minutes for the circular ones – or until a skewer inserted into the centre of the cake comes out clean.

Once the cakes are cooked, let them cool for about 10 minutes before removing from the tins (leaving the baking parchment on the base of the cakes) and leaving to cool completely.
To make the icing:
Beat the butter until it is fluffy.

Add half of the icing sugar and beat on slow until the icing sugar has mostly been absorbed before increasing the speed of the mixer. The icing will be quite stiff at this point.
Tip in the rest of the icing sugar along with both the vanilla and the cream cheese. Again, mix on slow to mash the sugar into the rest of the ingredients before beating on a high speed until the icing is fully combined.
For the fondant:
Place the marshmallows into a bowl along with two tablespoons of water.

Microwave in 30 second bursts, stirring between each one, until the marshmallows have melted.
Add a small amount of red and yellow food dyes to make the marshmallow a pale peach colour (like the colour of a brain – I refused to look up a photo of a real brain online).
Tip in around 2/3 of the icing sugar and used a spoon to mix together until the mixture looks lumpy.
Pour it out onto a work surface knead the fondant together. Add the remaining sugar as the fondant becomes sticky. The fondant is ready when a small amount pinched between your fingers can be pulled about an inch away from the main blob of fondant without breaking off. Wrap in clingfilm and place in the fridge.
To assemble a standard red velvet cake:
remove the baking parchment and stack the layers with a quarter of the icing between each one before spreading the remaining icing on the top of the cake.
To make a horrifying brain cake:
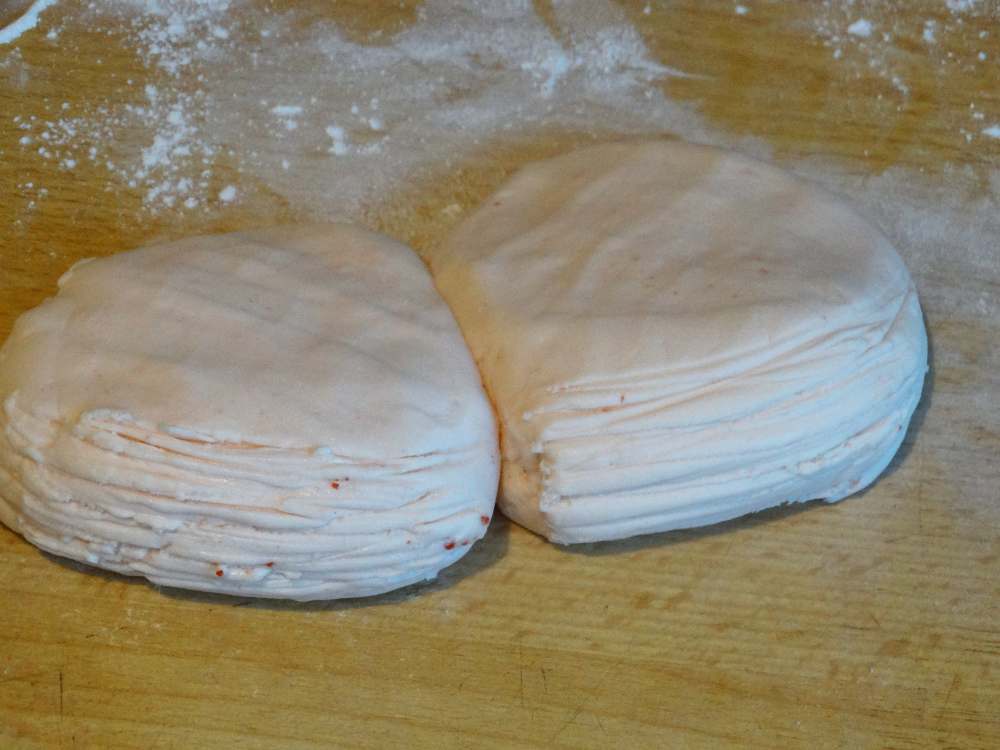
Cut the slabs of cake in half width wise.
Stack them on a board with a quarter of the icing between each one.

Carve the cake into the rough shape of a brain with a thin cleft down the middle. I googled cartoon pictures of brains to get a good idea of the shape without making myself feel sick.
Spread the remaining icing around the outside of the cake to create a crumb coat.
Place in the fridge for half an hour to set.
Once the cake has set, it is time to turn it into a brain.
Divide the fondant icing into quarters and roll one of them out into a snake about 1cm thick.
Cut the snake in half and then arrange each piece in symmetrical looping designs at the front of each hemisphere of the brain. It is easiest to start at the base of the brain to give the fondant some support from beneath, so it won’t fall off. Make sure that you leave a small gap down the centre of the brain to show the divide between the two hemispheres.
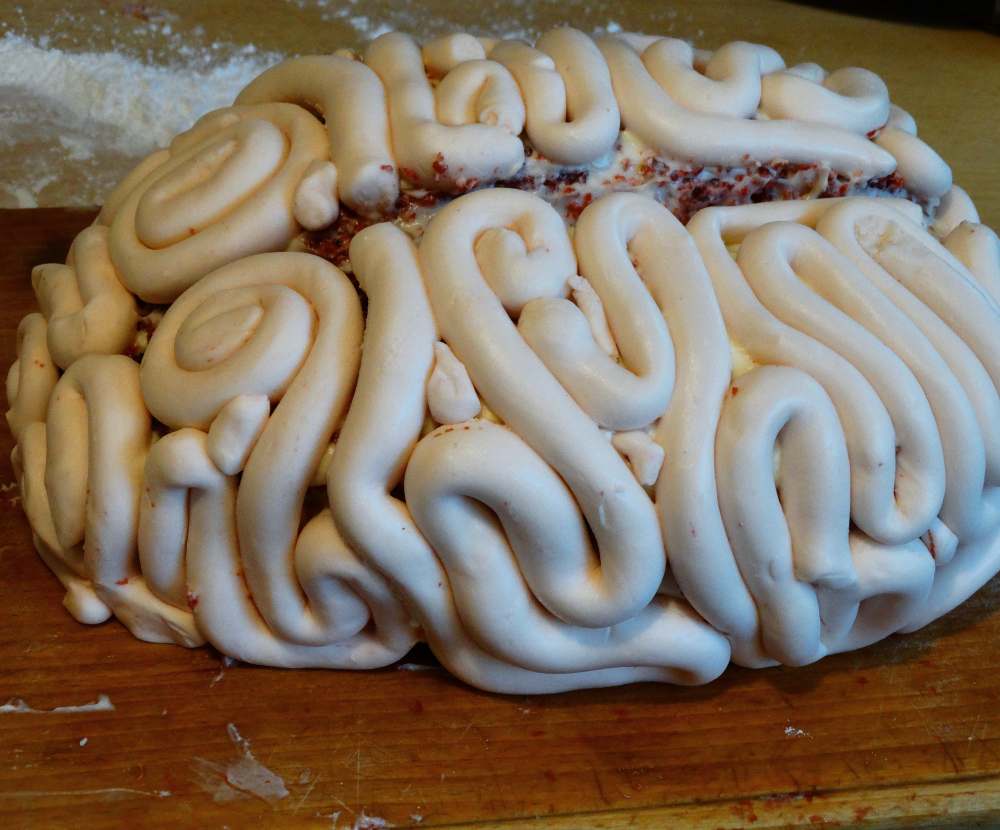
Use two more of the quarters to repeat the above process to cover the outside of the brain.
Take the last quarter and cut it in half. Roll each half into a short, thick sausage and flatten half of each one. These will make up the cerebellum which is a different shape to the rest of the brain. Indent lines along the outside of each of the sections of the cerebellum.
Place the cerebellum onto the serving plate and place the rest of the cake on top (ensuring the cerebellum is at the back).
Mix the jam with the remaining four tablespoons of water to thin it down.
Use a pastry brush to paint the entire outside of the cake with jam to make the brain look moist and fresh. If there are any sections with gaps in the fondant, add a little jam into the gap to make it look like the brain is oozing blood.


This brain cake is truly horrifying to look at and you don’t even need to clean down the serving plate as a little extra ‘blood’ just adds to the effect. The cake is moist and has a light chocolate flavour which works wonderfully well with the tangy cream cheese icing. It is sure to a lot of attention when you bring it into a room or even just have it sitting in the centre of a table when people arrive. The best way to serve it is to cut down the centre of the brain and then serve slices from each side.
I hope you enjoyed the recipe. If you love cake but would rather make one that is a little less terror inspiring, why not treat yourself to a beautiful unicorn cake? It’s ombre on the inside too! Of course, if you are more of a savoury person than sweet, you could always make yourself a big bowl of Laksa. It’s perfect to keep you warm as winter approaches.
Have a good one and I will be back next week with a flavour packed rice dish.

One Comment Add yours