I recently realised that in all of my recipes which used chocolate as a main ingredient, I have never actually talked about its origins which is something I am about to change.
There is evidence of the use of chocolate in drinks from almost 4000 years ago. The ancient Maya and the Aztecs were known to use it in drinks however the chocolate they consumed was nothing like what we have today. Cocoa beans are incredibly bitter and need to be fermented before they begin to taste nice. Even then, we still dry them, roast them and add sugar before they get close to our mouths.
The name chocolate derives from the Mayan word ‘xocolatl’ Nahuatl (the language of the Aztecs) word ‘chocolātl’. The Mayans used chocolate in celebrations and religious events. As cocoa beans grew so easily in Mesoamerica, chocolate was widely available and as a result everyone had access to it regardless of social status. Chocolate was so well thought of that there are paintings of the Mayan gods drinking it.
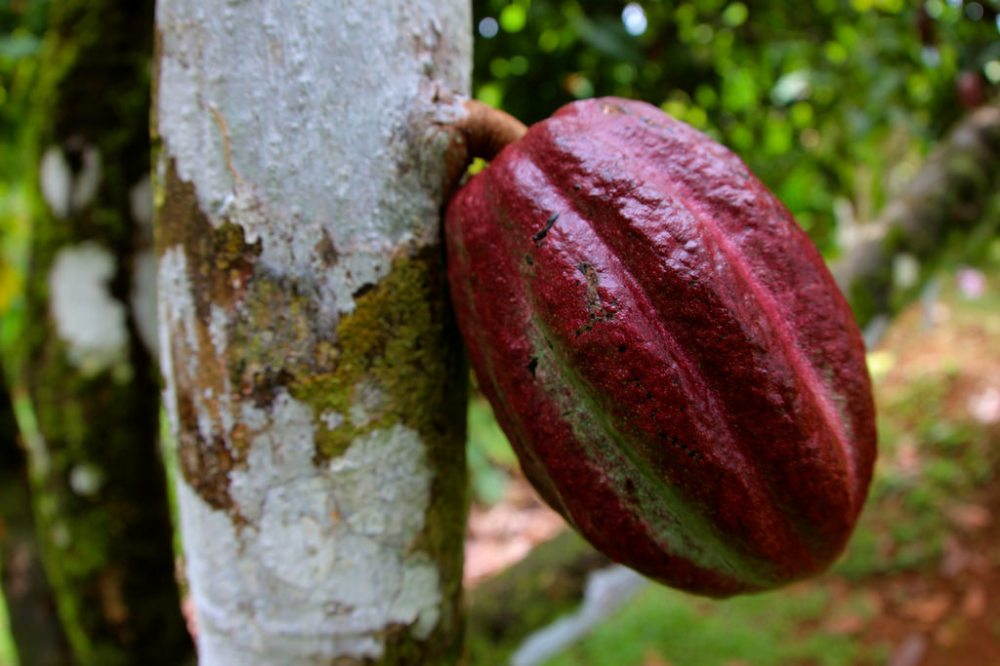
Like the Mayans, the Aztecs valued chocolate highly and also thought it had religious significance. They believed the removal of seeds from the pods they grew in was analogous to the removal of the human heart in ritual sacrifice. They would season chocolate with pepper and honey before they consumed it – almost like the world’s first chilli hot chocolate (except they drank it cold). Unlike the Maya, the Aztecs could not grow chocolate themselves as conditions were unsuitable so it was imported. As a result, cocoa beans were extremely valuable and were sometimes used a currency. When they conquered the Mayans, the Aztecs forced them to pay taxes (or ‘tributes’) in cocoa beans.
Since then, chocolate has become a world-wide phenomenon. It is consumed everywhere in, frankly, ridiculous quantities. Back in 2014, Switzerland held the crown for highest chocolate consumption per head with the average person eating 9kg of chocolate a year!
To produce chocolate, the beans must be roasted, cleaned, have their shells removed and ground up to create cocoa mass. This is then heated so that the cocoa butter melts creating a smooth, liquid called cocoa liquor. This is then either processed or left to cool in large blocks of raw chocolate which is then sold to different chocolatiers.
The raw chocolate can be re-melted and the cocoa butter is separated from the cocoa mass. These are then recombined in different ratios along with sugar, milk and oils to create the chocolate we know and love. The cocoa mass must be ground up to very fine particles which is what gives the chocolate its smooth mouth feel and is why you can’t just add cocoa butter to cocoa powder and sugar to create chocolate – the cocoa powder has particles with almost four times the radius of those in professional chocolates.
The cocoa butter is also important to making good chocolate. When you make decorations, many recipes will call for tempered chocolate. This is where you melt the chocolate and when it is cooled, prevent the cocoa butter from setting, but stirring, until it gets to the right temperature. This is because cocoa butter has six different crystal forms only one of which is completely solid at room temperature and you don’t want your carefully crafted decorations to collapse before everyone sees them! One way around this is to buy compound chocolate where the cocoa butter is replaced with vegetable oils – this means that you don’t have to temper it!
Luckily, the recipe this week doesn’t call for anything super fiddly like tempering chocolate. It does make one of the biggest cakes I have created though. With four layers sandwiched with cream and caramel, this cake is incredibly indulgent, exceedingly decedent and definitely worth it. It’s perfect to feed a crowd and if you only want a small one, you can easily half the quantities and only make a two-layer cake!
Chocolate, caramel layer cake
Prep time: 30 minutes
Cook time: 30 minutes (or 1 hour)
Cooling time: At least one hour
Decorating time: 30 minutes (plus 1 hour cooling)
Total time: 3 ½ – 4 hours
Serves 25
For the Cake:
100g cocoa (you want to use regular shop bought dutchy processed cocoa, not raw cocoa!)
200g dark brown sugar
500ml boiling water
250g unsalted butter
300g caster sugar
450g plain flour
1tsp baking powder
1tsp bicarbonate of soda
1tbsp vanilla extract
4 eggs
Pinch of salt
For the Icing:
½ batch of caramel (see Millionaire’s Shortbread recipe which gives instructions for the full batch)
200g butter (at room temperature)
450g icing sugar – sifted
¼ cup milk
For the filling:
300ml double cream
Preheat the oven to gas mark 4 (180oC) and line four eight-inch baking tins (you may have to make the cakes in two batches if you have fewer tins and this will also help ensure the cakes all bake evenly). I like to butter the tins, put a circle of parchment on the bottom and then give it all a coating of cocoa.

Place the cocoa and the dark brown sugar into a bowl and pour over the boiling water. Whisk this together.

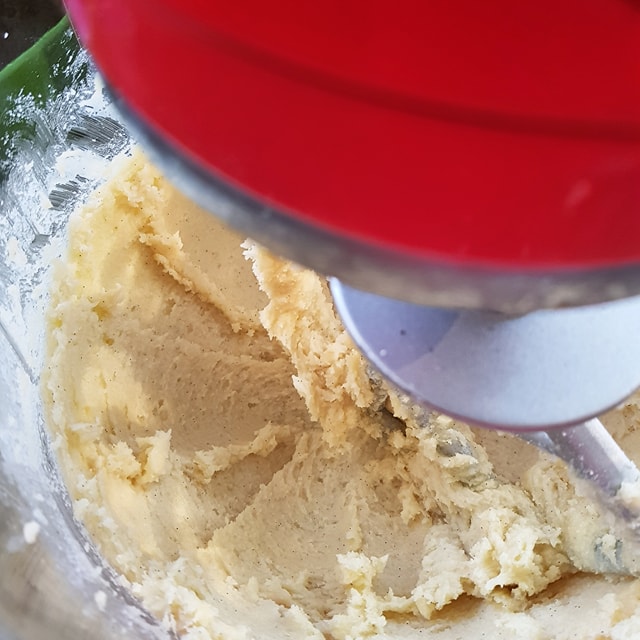
Cream the butter and the caster sugar until light and fluffy – about 5 minutes in an electric stand mixer.
Stir the salt, bicarbonate of soda and the baking powder into the flour.
Add an egg and a tablespoon of the flour mix and beat it together.
Repeat this until all the eggs are added.
Add in half the remaining flour and mix it together.
Add the rest of the remaining flour along with a couple of tablespoons of the chocolate mix to prevent the mix turning into a hard dough.
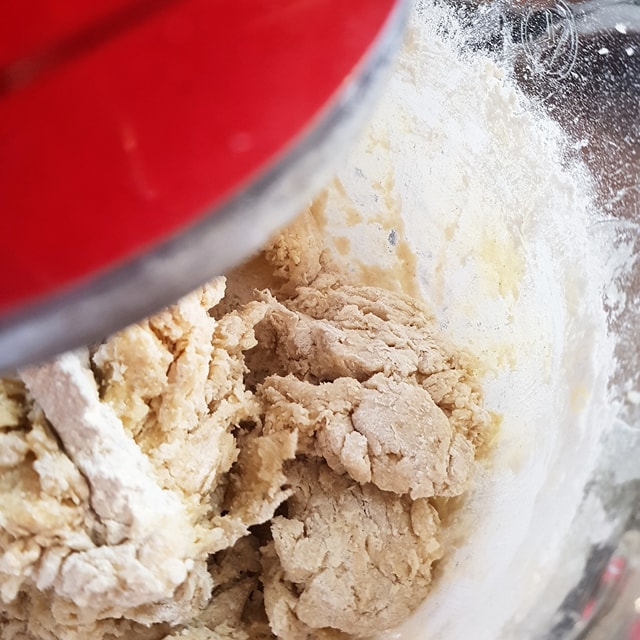
Add about a quarter of the remaining chocolate mix and make sure it is beaten through well so there are no lumps of while left.
Gently add the remaining chocolate mixture and slowly stir that through until all the mix is combined.

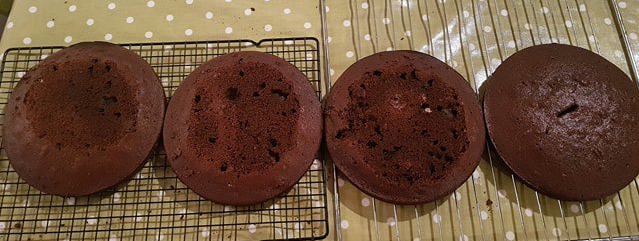
Divide this into your tins and bake them for 25-30 minutes, or until a skewer inserted into the centre comes out clean.
Let the cakes cool before filling them.
To make the icing, beat the butter for at least seven or eight minutes until it is light and fluffy. This step is imperative to making a smooth, spreadable icing.
Add half of the icing sugar and slowly beat it in to prevent covering the room in a layer of icing sugar.
Once it has been incorporated, beat the icing again on a medium to high speed for another five minutes.
Add the remaining icing sugar and repeat, beating for another five minutes. If the icing seems to be getting dry and clumping, add a tablespoon of the milk.
Add half of the caramel and beat it into the icing – the rest will be used later. The icing should now be smooth and delicious.
Once the cakes are cool, it is time to assemble them.
If the cakes are very domed in the middle, it’s best to level them a bit at this point. Us a sharp knife or a cake leveller to remove the top of each dome so the cake will be a more even shape.
Whip the cream to soft peaks – it should be able to hold its shape but not have started to split!
Place the bottom layer on the cake board and pipe a circle of the butter cream around the edge.
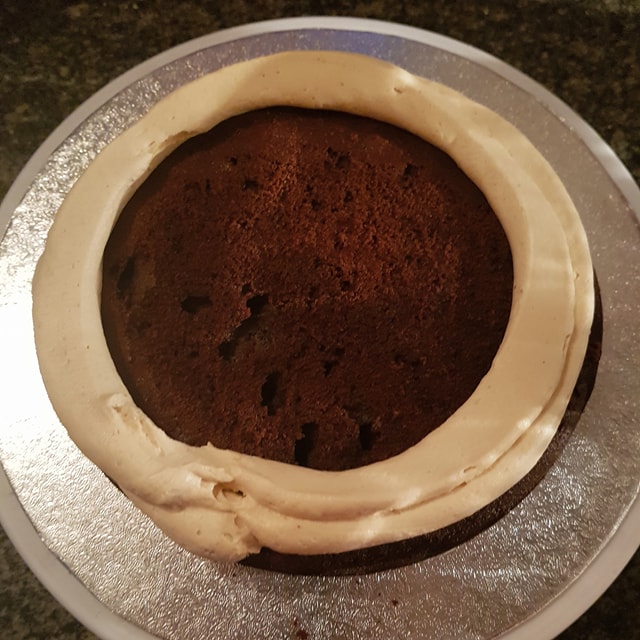
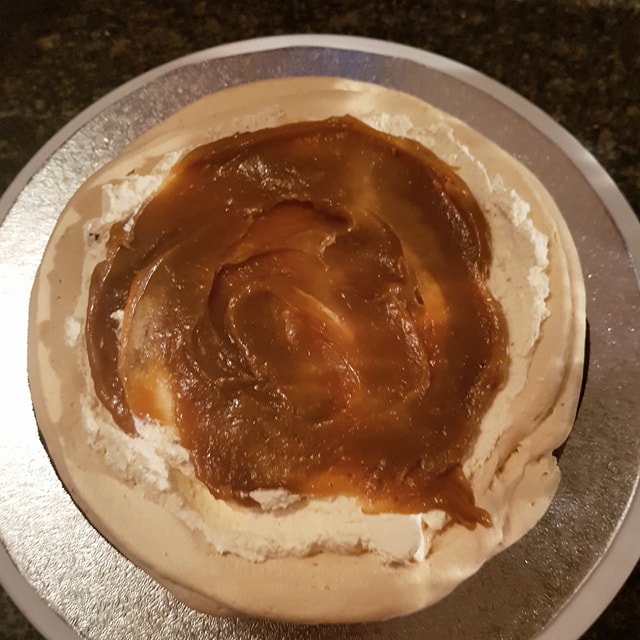
Spread the inside of the circle with one third of the cream and one third of the remaining caramel.
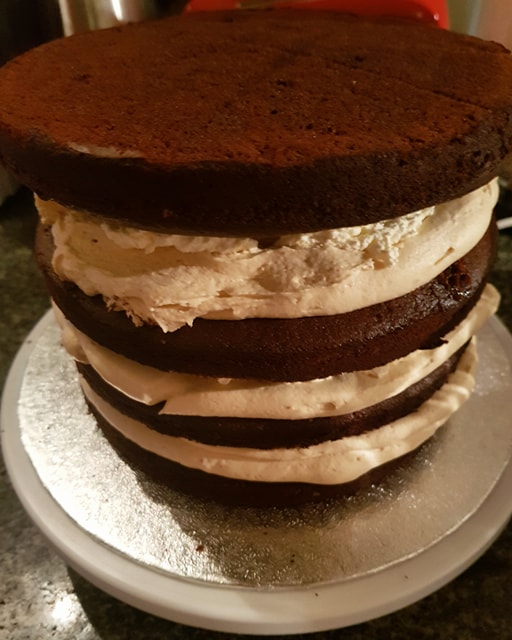
Add the next layer of cake and repeat this until you only have one layer of cake left to add.
When you add the final layer, add it upside down so the top of the cake is a smooth, flat surface. You may have to build the icing wall up a little higher on the third later to support this if your cakes aren’t completely level.
Cover the entire cake in a thin coat of icing and chill for an hour.
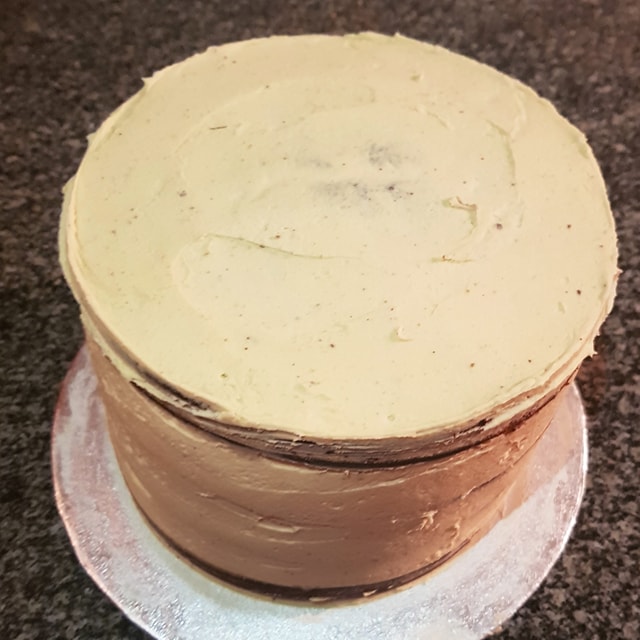
Once the cake has chilled, cover it in the remaining icing keeping about 4 tablespoons back for decoration.
Use the reserved icing to pipe designs onto the cake. You can make them more visible by adding a little cocoa to the icing so it stands out.

I hope you enjoyed this recipe and that you love the cake when you try it! If you fancy a little bit more baking, why not have a go at making some Brandy Snaps or for a quick and easy meal, make yourself some One Pot Pasta!
Have a good one and I’ll be back next week with a delicious curry recipe – it’s even going to be vegan!
H

What an incredible cake. Love the artwork on top (:
LikeLike
Thank you! I really enjoy piping decorations on cake so I’m glad it’s appreciated!
LikeLiked by 1 person