Whenever someone brings in a Fox’s biscuit selection (other biscuit selections are available), the first ones to go are the chocolatey ring biscuits. The other biscuits are nice but there is something about shortbread with an obscenely thick layer of chocolate that just can’t be beaten for most people. The recipe below is my take on these biscuits. The chocolate layer isn’t quite as thick but you are welcome to double up to a kilo of chocolate and double dip the biscuits if you want them to be ultra-chocolatey.
As the chocolate is being used to coat the outside of the biscuit, and thus will be handled when the biscuit is eaten, it is important to make sure that it is well tempered. Tempering is a process where you control the crystal structure which forms when the cocoa butter in chocolate cools. This is why compound chocolate doesn’t need tempering… there is no cocoa butter in it, they use other fats instead! But real chocolate, with cocoa butter, has a far nicer taste and mouth feel, so to get the best results we must temper the chocolate. This involves melting the chocolate, cooling to a specific temperature and then warming it slightly before it is used.
Cocoa butter has six crystal stages which are arranged by the temperature at which they form: I, II, III, IV, V and VI. This ability to exist in multiple different crystalline structures, as exhibited by cocoa butter, is known as polymorphism and this polymorphic property is what can make or break your chocolate work. When you buy chocolate it has already been tempered and it is packed solid with type V crystals – the tempering not only gives the chocolate a satisfying snap when you break it but also is what keeps it solid at room temperature. Crystal types IV and lower melt well below 27°C, well below body temperature meaning that your chocolate will be soft at room temperature or immediately melt all over the hands of anyone who tries to touch in. In contrast, type V crystals melt just below body temperature (33°C) meaning that your fingertips will not melt it when you pick up the chocolate as they are slightly cooler than your internal temperature but when you put the chocolate in your mouth, it will begin to melt.
The issue is that when you melt chocolate so it can be used for covering the biscuits, you destroy the temper, that is to say that the heating melts the type V crystals which the manufacturer formed in the chocolate. Because of this, you must make sure to heat the chocolate well above the type VI melting point (36-37°C) so that there are no “bad” crystals and you can start the process of forming the chocolate from an unadulterated mixture. While the type VI crystals are solid at room temperature, their melting point is too close to body temperature so they don’t melt in the mouth as nicely as type V. The addition of unmelted chocolate cools the mixture as the unmelted chocolate not only must be warmed to the same temperature as its surroundings but will take in latent heat so that it can also melt. This rapid cooling, whilst also agitating the mixture by stirring, prevents the formation of type VI crystals. The reason we continue to slowly cool the chocolate down to around 28°C is to make sure that it is close to the type V crystal formation temperature. It is then warmed just a little bit to melt any type IV crystals that could have formed, slackening the mixture in the process, and making the chocolate perfect for dipping.
You will notice when you temper chocolate that as you approach the correct temperature, the chocolate becomes a lot more viscous. This is a good indicator that you are almost ready to dip. It will also mean that you get a thicker layer of chocolate on your biscuit and that is always a good thing.
Chocolate Ring Biscuits
Prep time: 1 hour
Cook time: 18 mins
Dipping time: over an hour
Makes around 35-40 biscuits
Ingredients
11 oz. (310g) plain flour
1/4 tsp salt
7oz. (200g) butter
4 oz. (110g) sugar
2 egg yolks
1 tsp vanilla extract
To cover:
500g dark or milk chocolate (you will need to temper this if it is real chocolate).
50g white chocolate for decorations.
To make the biscuits:
Preheat the oven to gas mark 4 (180°C).
Place the butter and flour into a food processor and blend until the mixture resembles sand (this is like rubbing the butter into the flour – which also works – but is more effective as you don’t introduce heat from your hands).
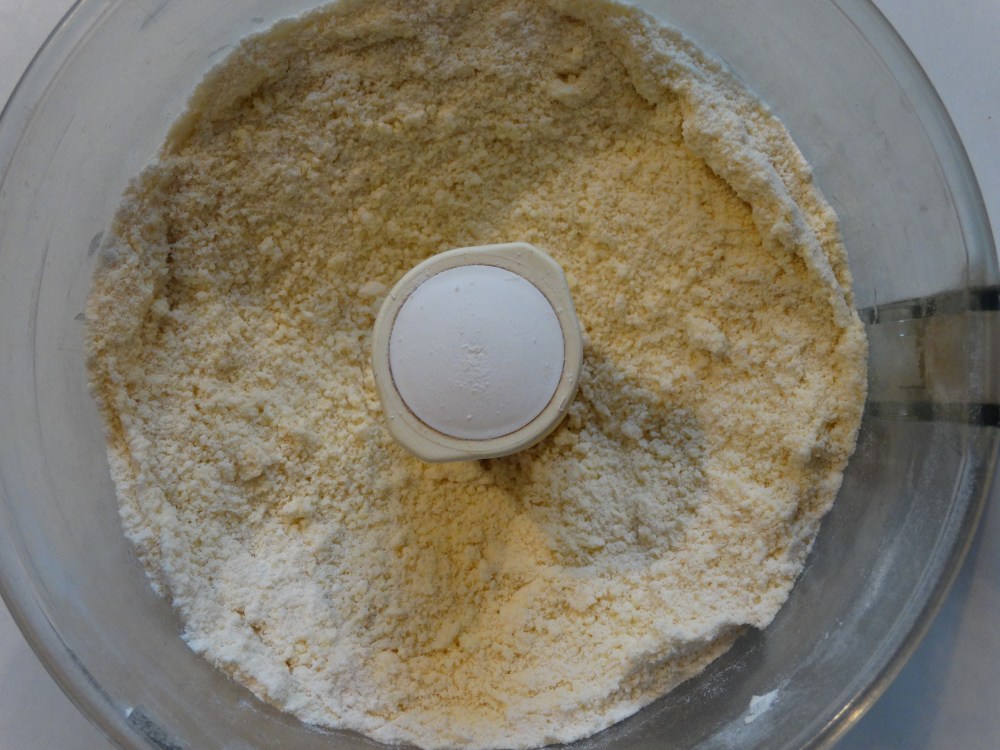
Add the sugar and salt and blend again until fully combined.
Pour in the vanilla extract and add the egg yolks. Blend again until everything appears homogenous.
The mixture should feel slightly sticky.
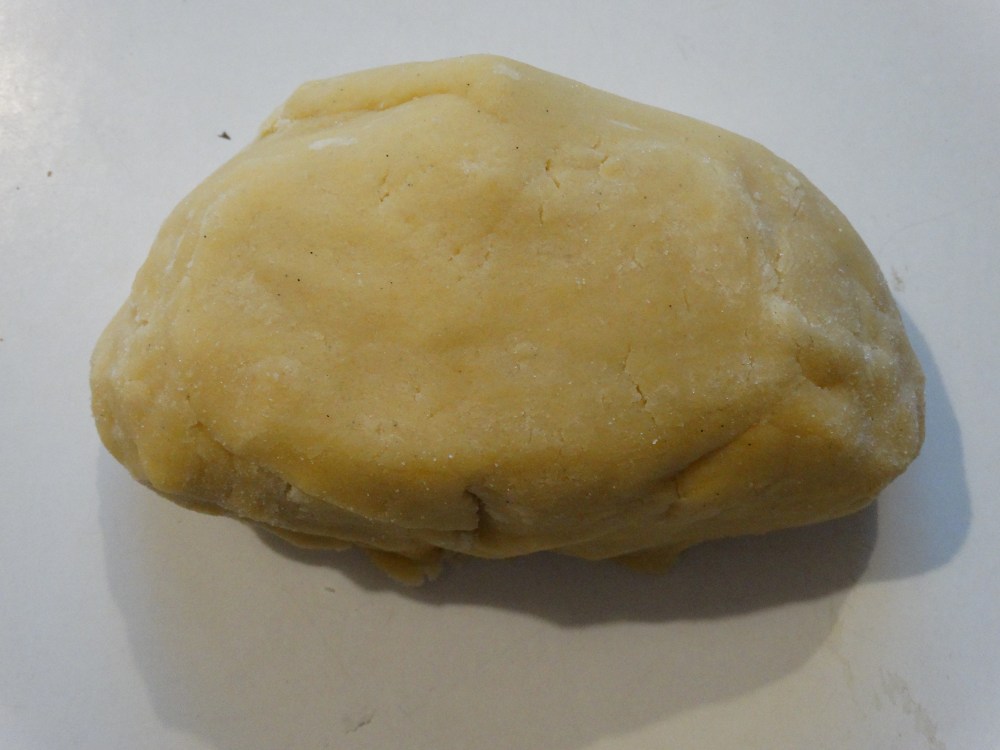
Pour the contents of the blender onto a surface. Use you hands to squeeze all of the bits together and continue to compress until the dough comes together but try to avoid kneading the dough too much so you don’t get too much gluten forming – a little is fine as you need the gluten to hold the biscuits together when you dip them.
Lightly flour the dough and roll out to ¼ inch (about 1/2cm) thickness.
Use a two-inch cutter to cut as many rounds out of the dough as you can.
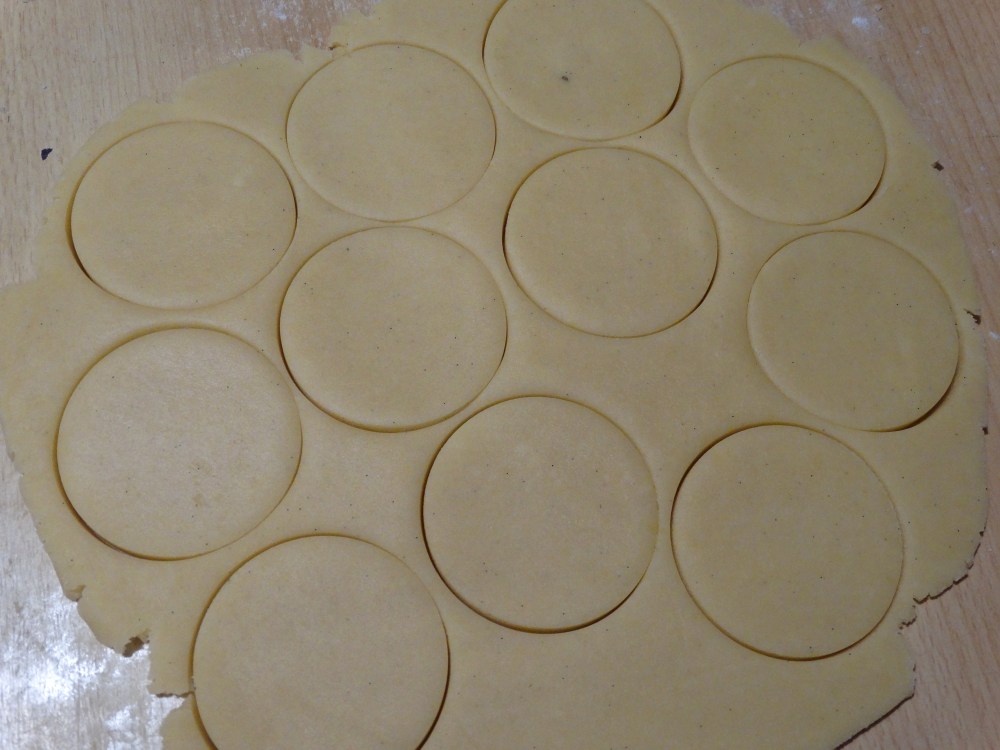
You can bake the biscuits as they are at the moment (circles) but you will get fewer than 40.
To make the rings, use a cutter just smaller than half an inch (about a centimetre) to cut a circle in the centre of each of the larger circles. I found that the cap from a bottle of whisky was best for this as I didn’t have a proper sized cutter.
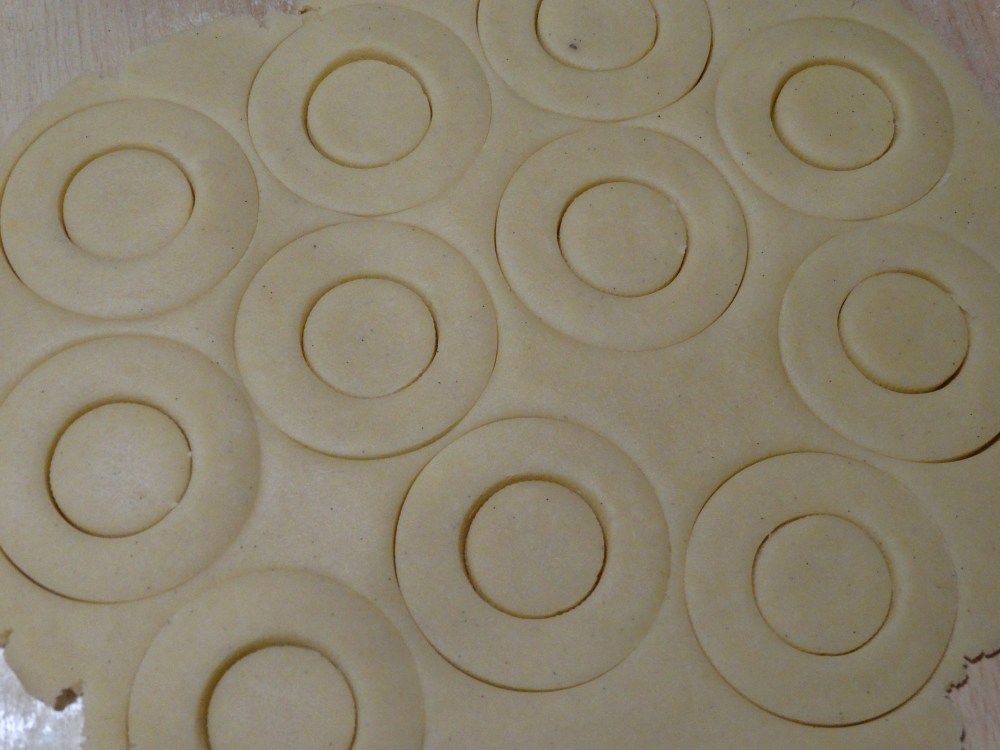
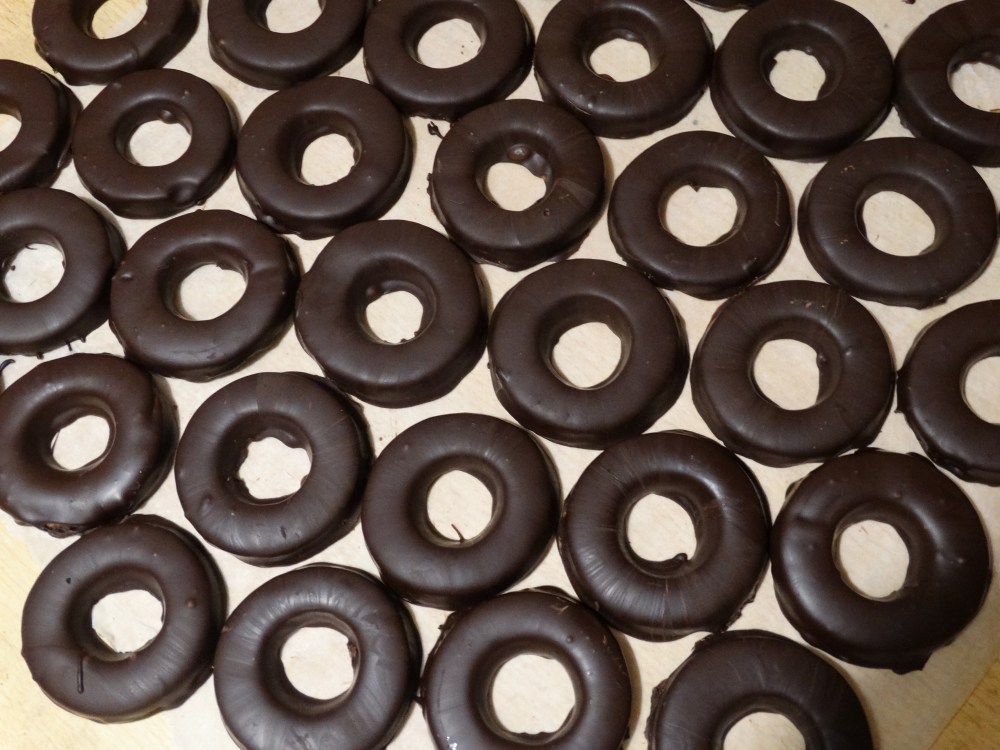
Place the rings on a tray lined with baking parchment – leave about an inch between each biscuit.

Place the rings on a tray lined with baking parchment – leave about an inch between each biscuit.
Let the biscuits rest in the fridge for ten minutes to firm up.
Bake for 18 minutes – or until the biscuits start turning golden around the edge.

When the biscuits are cooked, transfer them to a wire rack to cool and leave until completely cold.
If you are using compound chocolate, ignore the tempering instructions. Just skip to the dipping stage.
Tempering the chocolate
Chop up two thirds of the chocolate and place it into a large bowl.
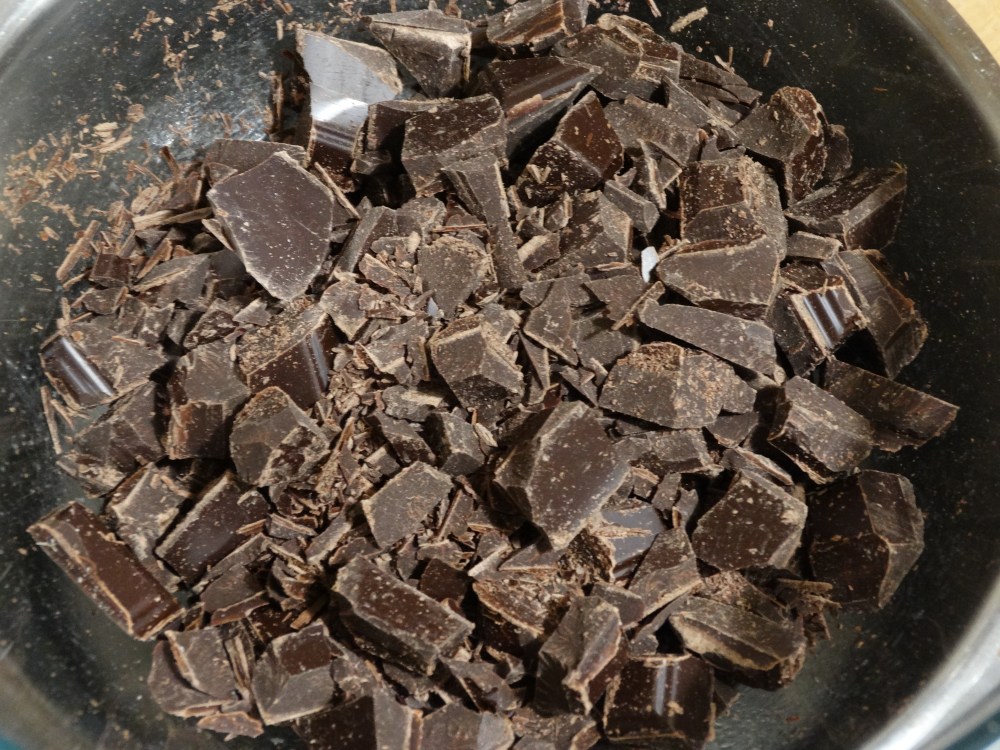
Roughly chop the remaining chocolate and place in a smaller bowl and off to one side for later.
Fill the base of a saucepan with water and place the big bowl of chocolate over the top.
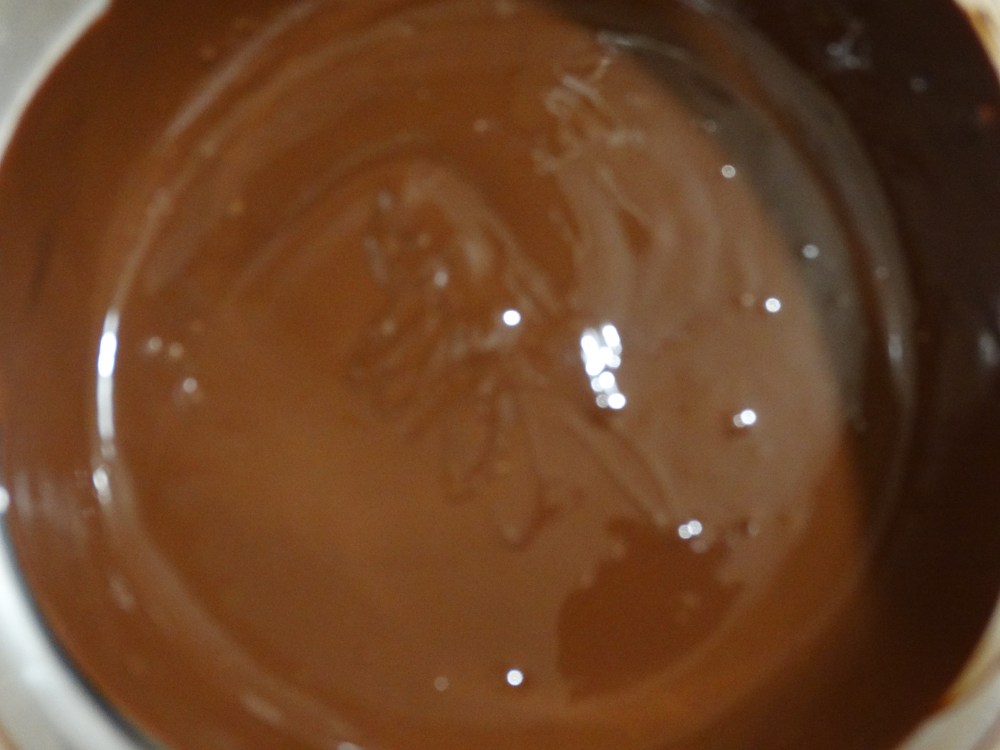
Heat the water until it is just simmering – don’t let it properly boil – whilst occasionally stirring the chocolate in the bowl until it melts. Don’t stir to vigorously (it’s just unnecessary).
Continue to heat the chocolate until it has reached 55°C for dark chocolate or 45°C for milk chocolate. If you do not have a thermometer, dip your finger in and the chocolate should be uncomfortably warm. If you do have a thermometer, you can still dip your finger for an excuse to eat some of the melted chocolate – I would. PSA: remember to wash your finger between dips
Remove the bowl of melted chocolate from the heat.
Tip the contents of the smaller bowl (the unmelted chocolate) into the melted chocolate and gently stir. This will bring the temperature of the chocolate down whilst also introducing the desired V crystals into the mixture. These V crystals from the unmelted chocolate will help seed the formation of more of them in the melted chocolate as it cools.
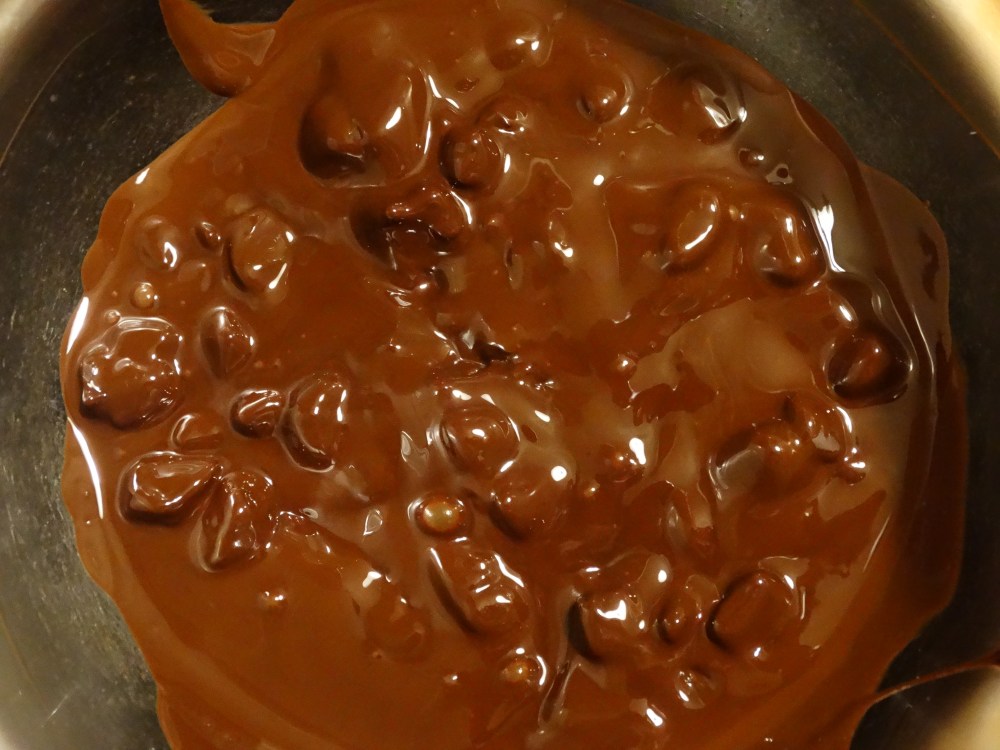
Continue to stir the chocolate until it reaches about 29°C for dark chocolate or 27°C for milk chocolate. This will feel cool to the touch. If you dip a spoon in the chocolate and place it in the fridge, the chocolate should harden very quickly to a semi-shiny state on the back of the spoon.
Place the chocolate back over the heat until it reaches 31°C for dark or 29°C for milk. If you don’t have a thermometer, heat it gently for about 45 seconds to a minute. This will slacken the chocolate a little making it easier to work with.
Remove the chocolate from the heat again.
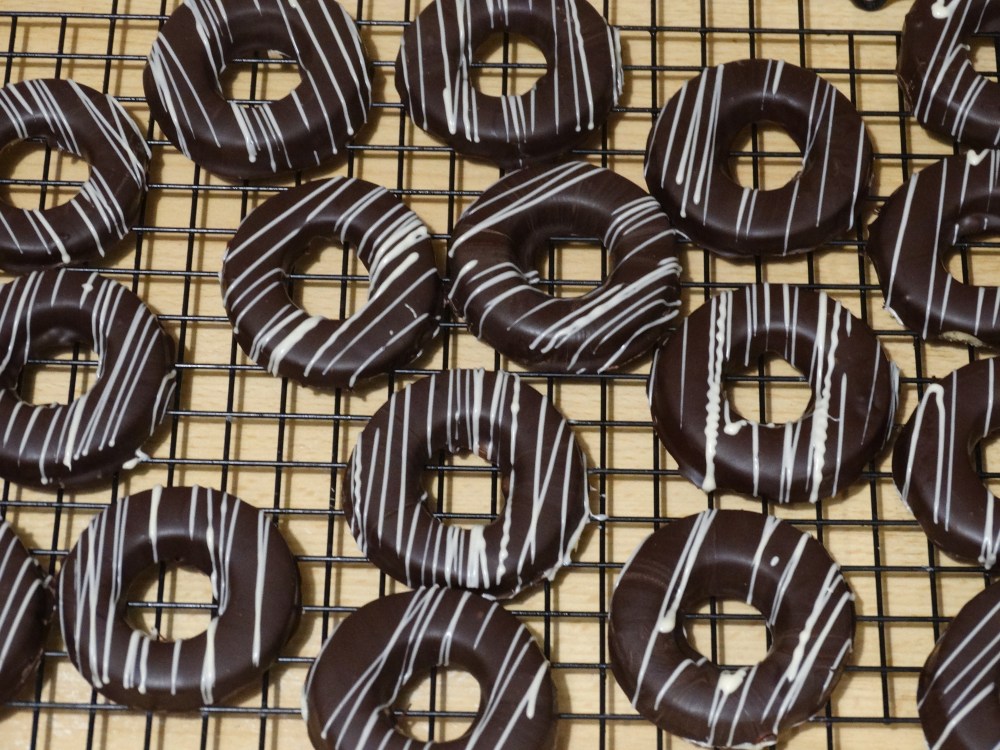
The Dipping
Set up a dipping station with the biscuits on one side of the bowl of chocolate and a lined baking sheet on the other.
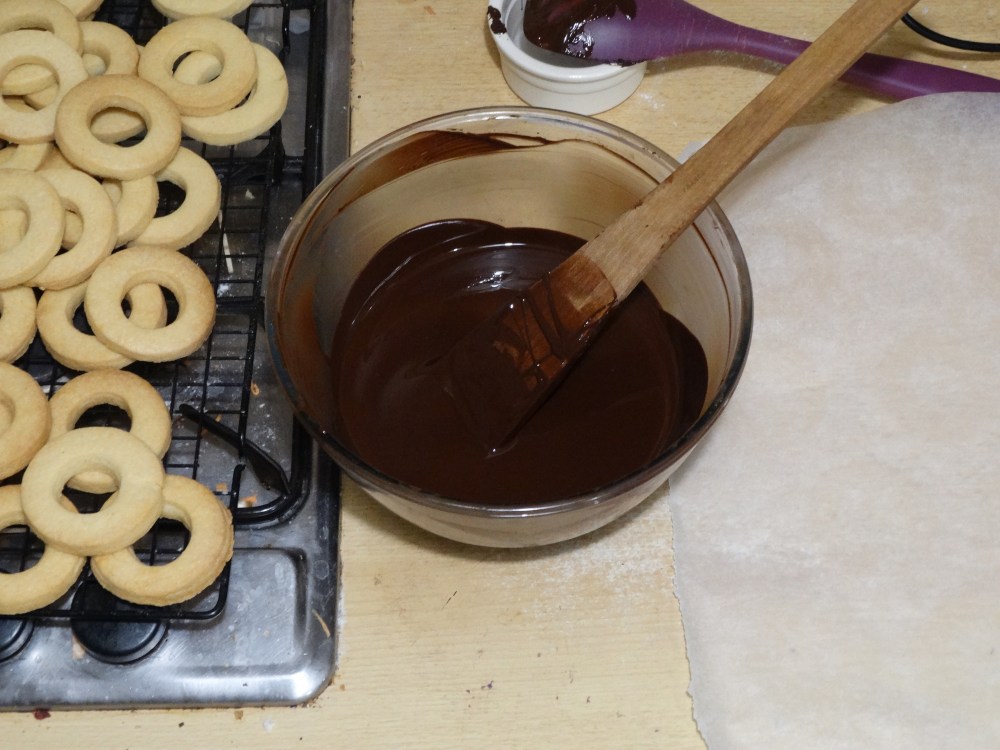
Use a fork to place a biscuit into the chocolate and make sure it is just covered.
Lift the biscuit out and gently tap the fork on the side of the bowl a few times to let the chocolate drip off.

Place the biscuit on baking parchment and repeat with the rest.
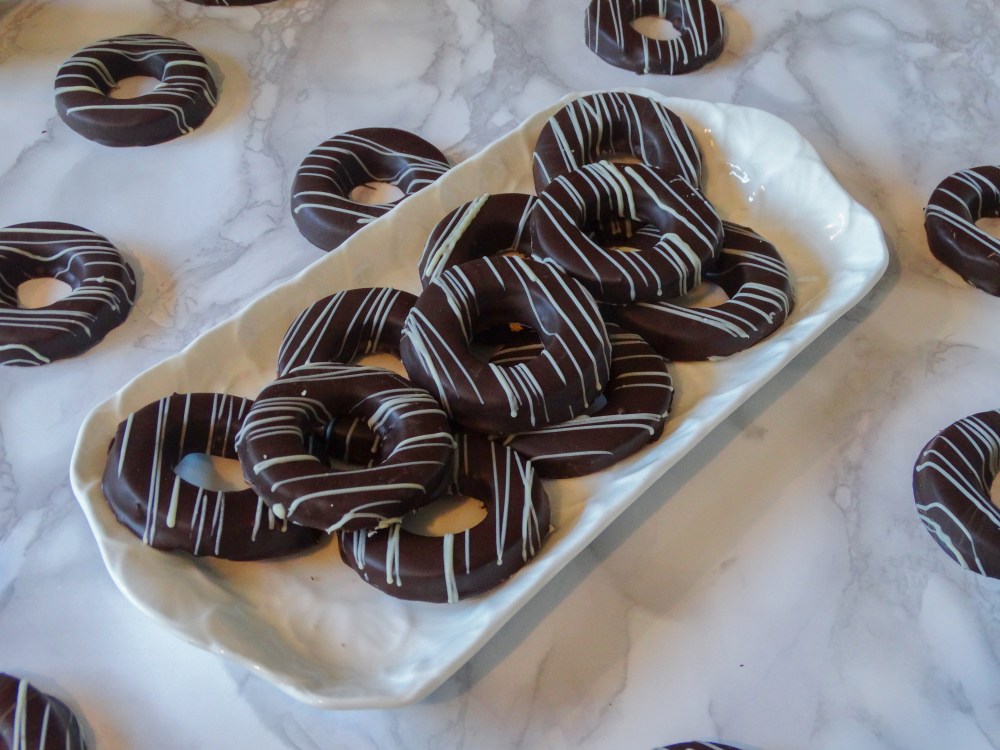
For the white chocolate decoration, melt the white chocolate in the microwave in fifteen second bursts stirring between each heating.
Pour the chocolate into a piping bag, make a tiny hole in the end and pipe lines of chocolate across the entire batch of biscuits. This will ensure that the biscuits have the same design but each one is unique.
I hope you enjoy the recipe. If you fancy trying some classic shortbread or alternatively, going the other way and making yourself some millionaire’s shortbread, you should definitely check out my recipes for them.
Have a good one and I will be back next week with a super duper spicy recipe.
H
