I finally bought a pizza stone a couple of months ago after restraining myself for years. I had never cooked with one but they are supposed to make your pizza better and I had been having issues with a soggy and undercooked pizza crust for quite some time. The result? Crispy crust, quick cooking time, all round better pizza in my opinion.
Question: what is a pizza stone? Answer: it is a relatively simple way of recreating the conditions found inside a pizza oven without having to go out and build yourself a new, extraordinarily expensive piece of kit. The moment the dough hits the stone, it is exposed to a huge amount of heat which makes the yeast go crazy giving a super puffy, air-filled crust. The pizza stone retains its heat well so the addition of a (comparatively) cold pizza on top of it does little to lower its overall temperature. This causes the base of the pizza to cook fully and quickly, giving a solid, crisp base that will not be soggy. Any sections of dough which may be a little wet quickly dry, as the pizza stone is porous and thus pulls moisture out of the base of the crust again leading to a crispier base… I think there may be a pattern here. Basically, this can all be summed up as: the pizza stone ensures the crust is cooked quickly and properly and – most importantly – fully before the toppings begin to burn.
I have used metal trays for baking pizza and, while they do work, the best method I know still involves preheating the tray and then transferring the pizza onto it. Unlike the stone, metal is not porous, so any steam which may escape through the base of the pizza is trapped against the dough – causing it to be reabsorbed and softening the dough. Some methods of cooking use both a pizza stone and a metal sheet. The pizza goes on the preheated sheet and the stone rests on a wire rack directly above the pizza. Again, this is recreating the conditions of a pizza oven where extreme heat is being blasted at the pizza from all directions, the base of the oven, the roof, even the walls all help cook the pizza.
When it comes to hand stretching dough, I have found that the best way to learn is watching online tutorials. Written instructions are ok but it is so much easier when you can see what is going on. It may split the first time… or the second… or even once you think you know what is going on but this is fine – I just stitch it all back together and after the cheese is added, no one will be able to tell. Stretching the dough by hand, in my experience, is the best way to get a puffy crust on the pizza. When you stretch it, the dough from the centre of the pizza is slowly transferred to the outside. This can weaken the centre of the pizza though so make sure to keep an eye on it and if any bits seem dangerously thin, try and avoid stretching them any more than necessary.
Sourdough pizza (like normal sourdough bread) takes time and you need to plan ahead if you want to eat it. Luckily, the majority of the time needed is resting and proving so it is not too time consuming when you are actually making it. I prefer the taste of sourdough bases but let me know what you think if you try it. If you don’t have a sourdough starter, you can always make your own or you could get some from a friend. I am sure there will be someone in your local area with one who would be happy to donate a little to you.
Sourdough pizza:
Prep time: 15 minutes
Cook time: 10 minutes
Rest time: 16 hours
To reactivate the starter:
½ cup sour dough starter
1 cup strong white flour (around 125g)
1 cup water
For the dough:
75ml water
500g flour
2 tbsp olive oil
10g salt
For toppings: tomato passata, mozzarella, any other toppings of your choice
Mix the starter with one cup of flour and one cup of water. Cover and leave overnight. You can use the starter straight from the fridge, no need to warm it up as that is what this step will do.

In the morning, add the flour for the dough, 25ml water and oil to the reactivated starter. Mix until it forms a shaggy mess – it need not all stick together at this point. Cover and leave to rest for 30 minutes to an hour.
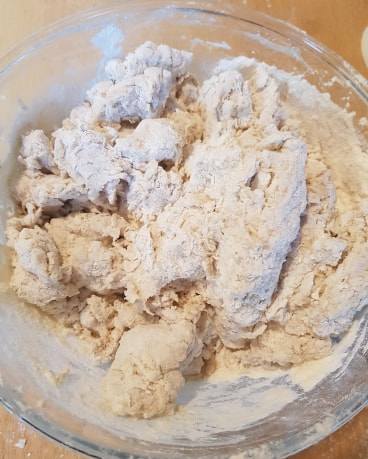
Sprinkle over the salt and the rest of the water and knead to combine.
Knead the dough for five to ten minutes until it is smooth and elastic.

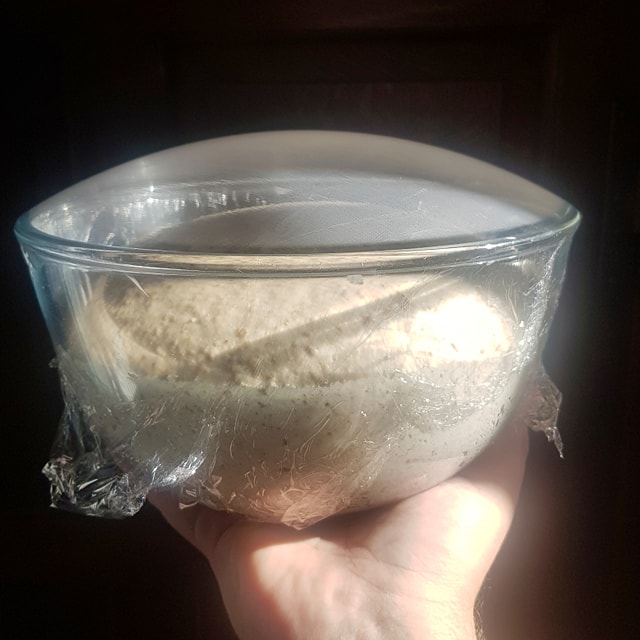
Cover and leave to rise for six or seven hours. I would set this up before work and leave it in a cool place throughout the day.
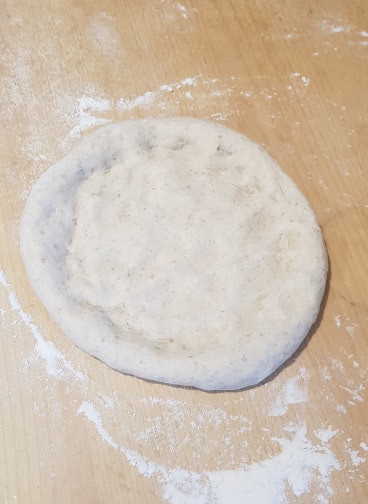
About an hour before making the pizzas, split the dough into four and shape each quarter into a ball. Cover and leave again for half an hour to let the gluten relax.
Place a pizza stone into the oven and turn your oven to the highest setting (mine is gas mark 9 at around 250°C). ALLOW THIS TO HEAT UP FOR AT LEAST HALF TO THREE-QUARTERS OF AN HOUR.
Take one of the balls of dough and flatten it using your fingertips. Stretch the dough until it is the same size as your stone. This can be done by picking it up at the edge and rotating the dough so its own weight stretches it. This ensures the dough in the middle of the pizza is nice and thin and the edges are a bit thicker so you get a good crust. You could also use a rolling pin if it is easier for you.
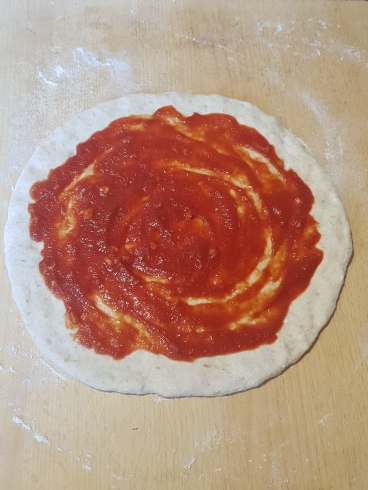
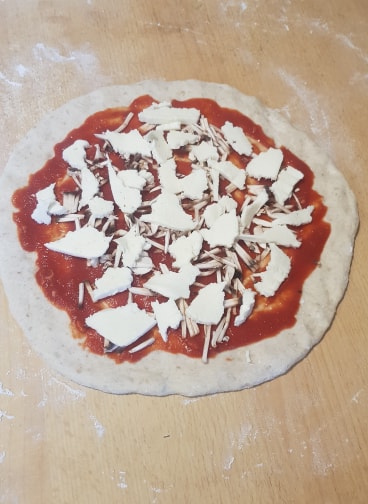
Spread the tomato paste out from the centre until it is half an inch from the outside of the dough.
Grate/thinly slice the mozzarella and sprinkle it over the pizza. Top with your favourite toppings.
Using a single, swift motion slide a peel underneath the pizza. (A peel is just a large, flat paddle. It might be worth practicing getting the pizza onto and off of the peel before you add the toppings (as in when it is just the base)). You cannot build the pizza on the peel as it will stick if it is left there too long. If you do not have a peel (like me) you could use a cake lifter or even make the pizza on baking parchment and slide this parchment from a normal baking tray onto the pizza stone.
By gently shaking the peel, slide the pizza onto the pizza stone and bake for five to ten minutes (depending on your oven temperature). When the pizza is done, it should be able to be tilted by lifting up one side as the base will be cooked and a little crispy.

I hope you enjoyed the recipe. If you would like to have a go at normal, non-sourdough pizza, check out my recipe. The crust is super light and fluffy and it tastes amazing. I have been known to lightly brush the outer crust (without the toppings) with garlic oil and give it a sprinkle of sea salt for extra flavour.
Have a good one and I will be back next week with a delicious sweet treat.
H
