Chocolate Tart
Hey guys,
As promised last week, I return with the most amazing chocolate tart you will ever make. It contains not one, not two but four types of chocolate and a hidden layer of caramel. To be honest, this tart should probably come with a myriad of health warnings and possibly an ambulance on speed dial but it is 100% worth it!
I love making caramel. It can be a little bit daunting the first time and you do need to be careful as the melted sugar is very hot however homemade caramel is just so superior to shop bought that in my opinion, it is very much worth a little extra time making the filling instead of buying it. WARNING – melted sugar will burn instantly. If you do get any on you, immediately stop what you are doing (the tart can wait –you can not) and hold the area under cold water for at least 5 minutes if not more. It will hurt but isn’t too serious.
You have a couple of options when it comes to melting sugar for caramels or decorations. The slower but more controlled method which I use if I need a specific temperature of sugar or don’t want a deep golden caramel involves melting the sugar with a small amount of water and then boiling the sugar syrup until it achieved the desired temperature. This is particularly useful for making a large batch of caramel for things like a croquembouche. The other method, the one used in this recipe, involved holding your nerve a bit and directly melting the sugar in a pan. I am unashamed to admit that it took me about 5 years to become confident enough in my culinary skills to attempt this method instead of the syrup one.
Caramel is produced when you drive water away from sugar by heating it. If making large amounts, you will quite often add glucose syrup or a small amount of vinegar as it helps invert the sugar preventing crystallisation which will ruin your dish. This is where the caramel will suddenly turn solid and brittle again and no amount of heating can save it. You just have to start again! To prevent crystallisation, you should never stir the boiling sugar syrup once the sugar has all dissolved in the water and if making it via the more direct approach, treat the sugar incredibly carefully as it is a real diva in the kitchen. Inverting sugar is not always necessary as you can buy Invert Sugar Syrup in some areas however you don’t need it for this recipe! It occurs as glucose and fructose are isomers (they have the same chemical composition, just in a different formation. Think of them as anagrams of each other). The colour of the caramel comes in part from the long chain carbohydrates contained (24, 36 and 80 carbon atoms long!) and also from by products produced when the sugar is heated.
This tart is particularly good at a dinner party. Wow your guests with a delicious homemade dessert which looks like you’ve just picked it up from a professional patisserie. Serving it with fresh fruit like strawberries can give it some semblance of health even though we all know it’s only for show! You can also use this recipe to make mini tartlets which is what I do if I have enough excess pastry
Quadruple Chocolate and Salted Caramel Tart
Serves 12-15
Preparation:1 hour 10 minutes
Cooking:25 miutes
Resting:1-1½ hours
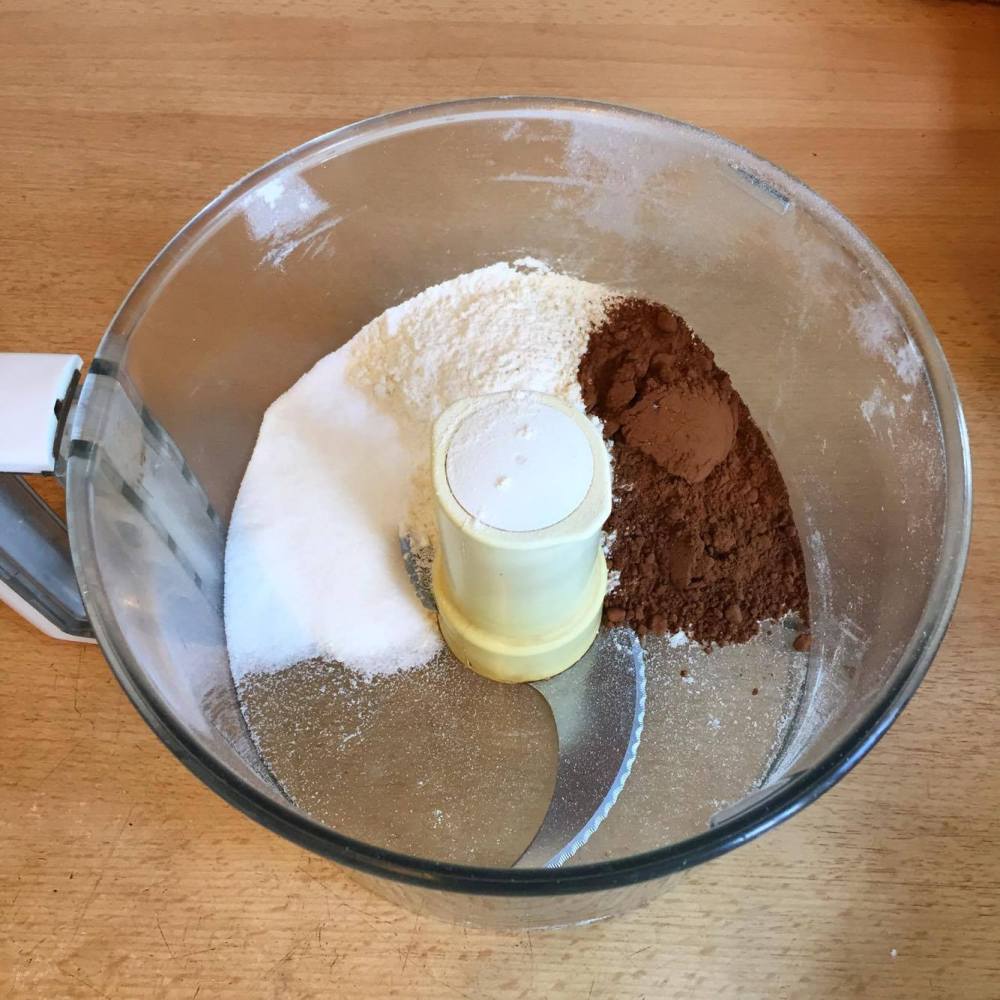
Pastry
160g plain flour
25g sugar
2tbsp cocoa
75g unsalted butter
1 Large egg yolk
½ tsp vanilla
Salted Caramel
225g caster sugar
100ml double cream
125g salted butter
Chocolate filling
300g dark chocolate
200g milk chocolate
100g white chocolate
500ml cream
50g unsalted butter
½ tsp vanilla
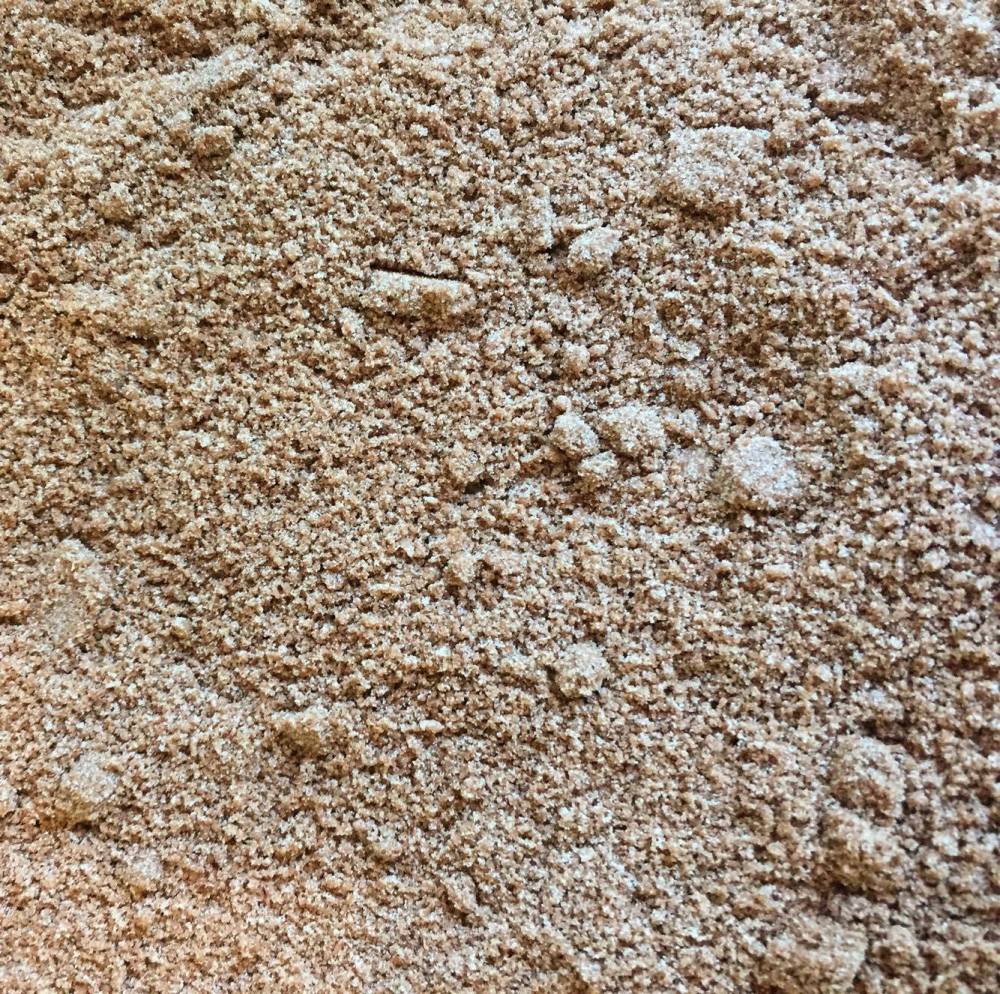
For the pastry, place the flour, sugar, cocoa and butter into the bowl of a food processor and pulse until it appears as fine breadcrumbs. Alternatively, rub the butter into the flour and stir in the other dry ingredients.
Make a well in the centre and add the vanilla and the egg yolk.
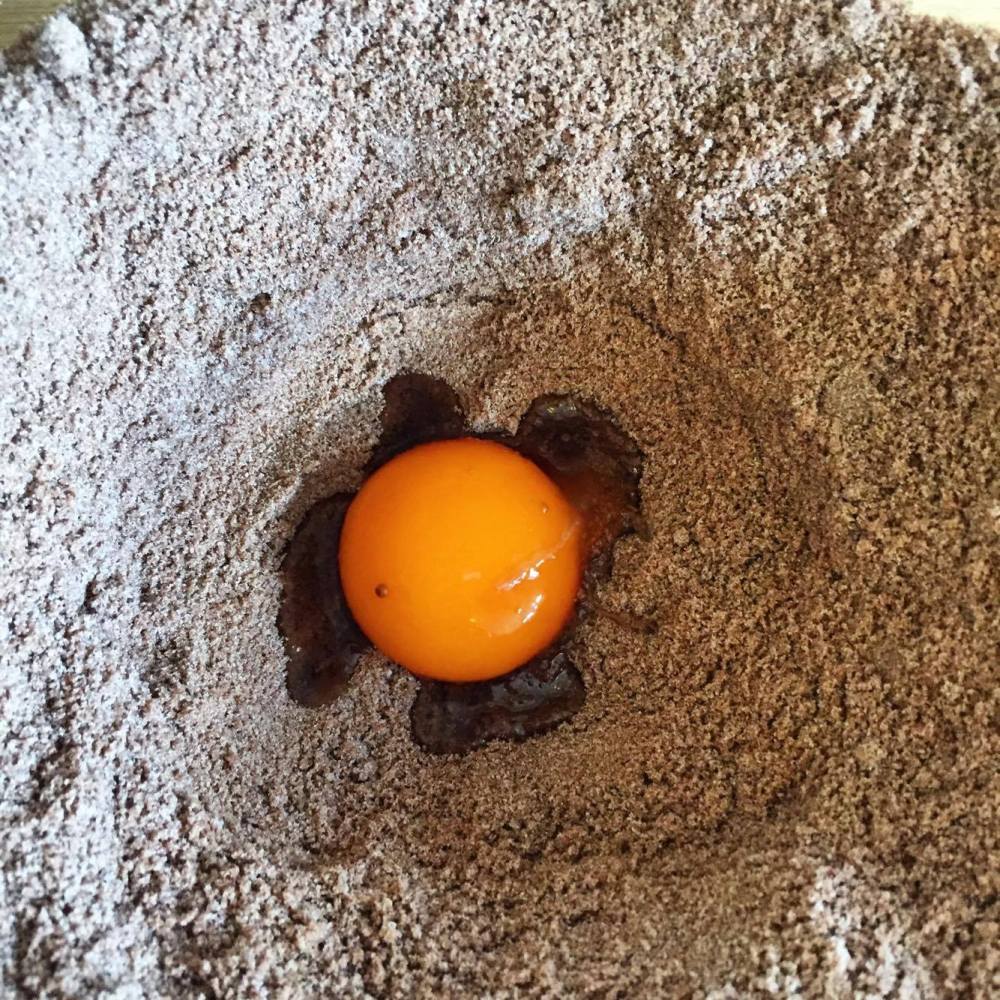
Mix until just combined, pour onto a worktop and knead until a homogenous dough is formed but do not overwork the dough!
Put the dough into the fridge to rest for an hour.

Preheat your oven to gas mark 5 (190oC).
Roll out the dough and line a 9 or 10 inch tart pan preferably, one that has a removable base – you may have to wait a few minutes for the dough to soften up.
Trim the excess dough leaving a little hanging off round the edge – this is so that if the dough shrinks, the excess dough will make sure the tart doesn’t lose height. Alternatively, you can trim all the excess dough off and then place the lined case in the freezer for another half hour to make it really firm which should prevent shrinking altogether.
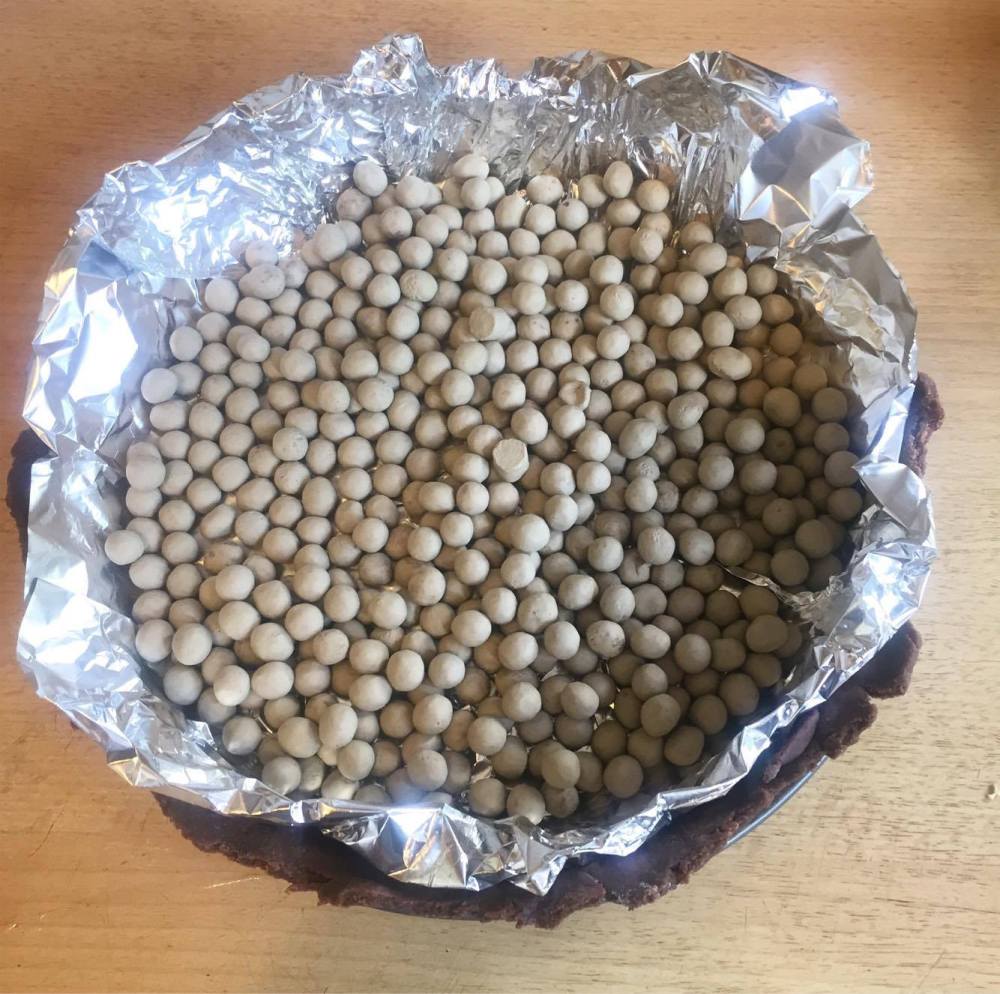
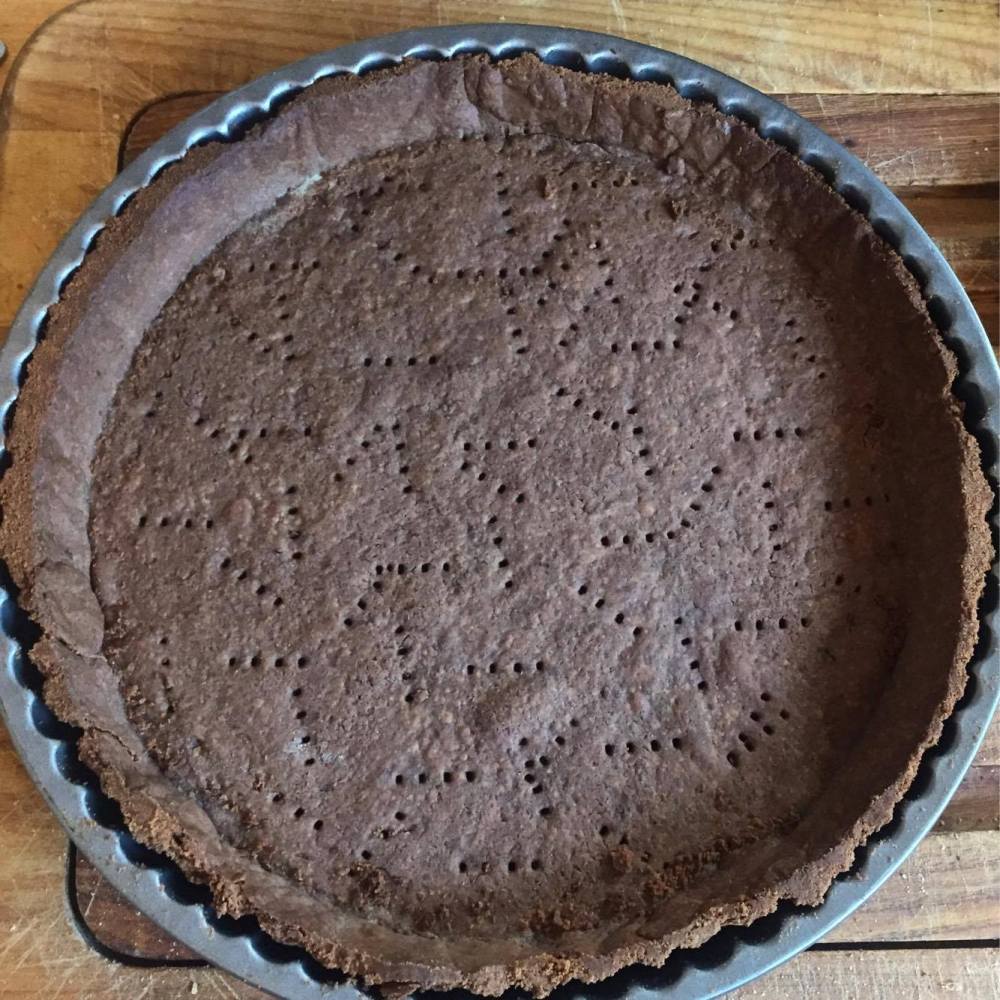
Prick the bottom of the pastry case with a fork so it doesn’t crack, line it with foil and pour in baking beads (or rice/pasta/lentils if you don’t have them) – this prevents the case from bubbling up and keeps the base nice and flat.
Bake for 15 minutes. Remove the baking beads and bake for another 10 minutes so the pastry case if fully cooked.
If you still have bits of pastry overhanging the tin, use a sharp knife to trim off the edges and neaten it up.
To make the caramel, place a third of the sugar in a heavy based steel pan – non-stick pans encourage crystallisation which ruins caramel.
Heat the sugar on a medium heat and as it starts to melt, use a wooden spoon to gently move some of the unmelted sugar into the melted areas. Move the pan on the hob so no area gets too dark when melting. You don’t want to burn the sugar. Turn the pan onto a medium to low light for the rest of this.
Once about half of the sugar in the pan has melted, sprinkle on half the remaining sugar and gently stir the melted areas. The sugar may start to clump but don’t worry!
As more of the sugar melts, sprinkle on the remaining sugar and continue to agitate the melted areas in the pan to prevent burning and to bring the unmelted sugar into contact with the heat.
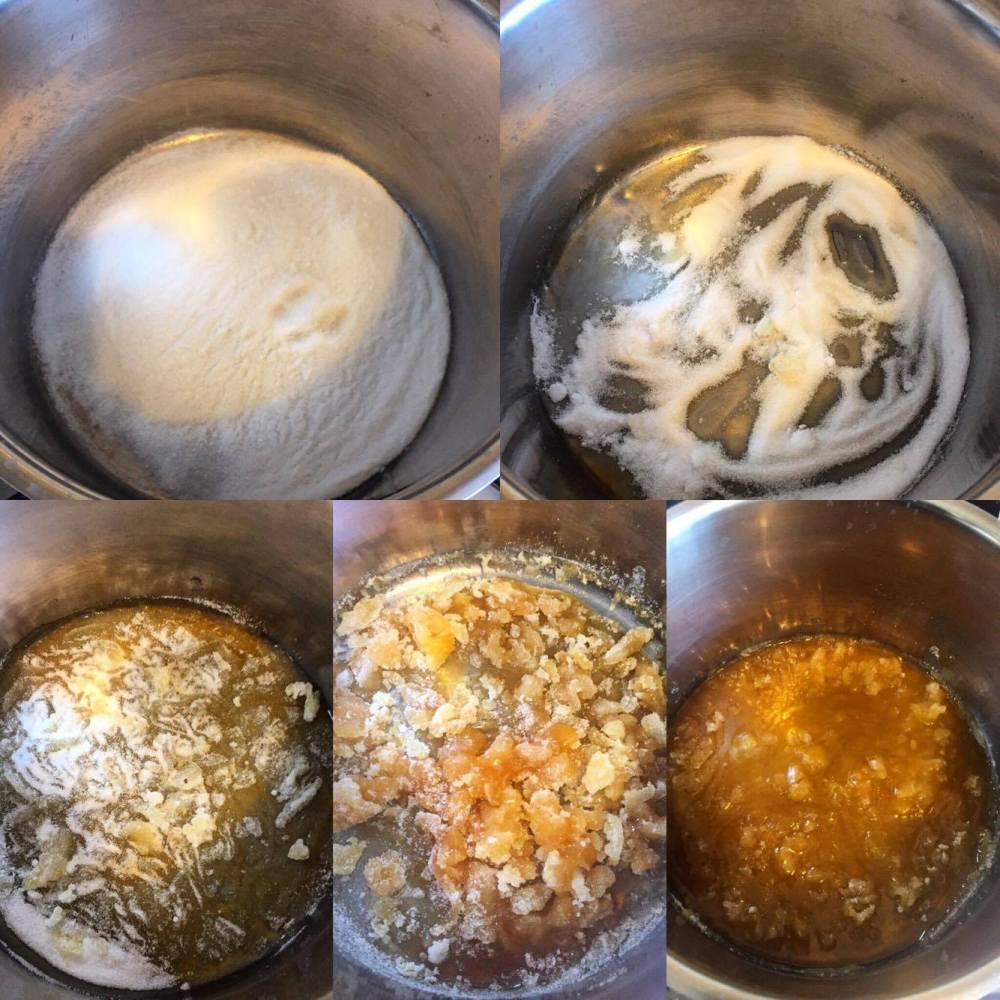
Once the sugar has all melted, you should have a light caramel. If it is cloudy, that means not all the sugar has melted! Swirl the sugar in the pan a little to help stir it but at this point, do not use the spoon as it will make the sugar crystallise.
When the caramel is clear, continue heating slowly until it is a deep golden colour. Swirling it gently will help mixing it in the pan so it doesn’t burn.
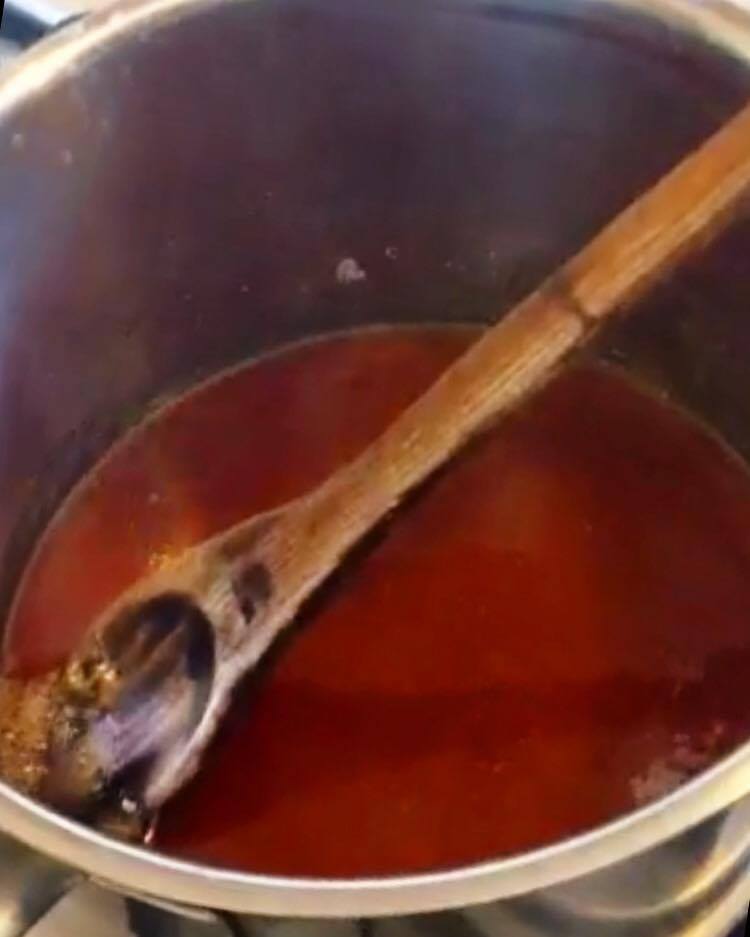
The moment the caramel is a rich golden brown, remove it from the heat and immediately pour in the double cream. BE CAREFUL – the cream will bubble and steam vigorously so make sure you are using a big pan so it doesn’t spit out of the pan. Stir the caramel to make sure it is all mixed. The area with the cream may be thicker than the melted sugar as it is cooled a little but it will remelt and everything will mix together nicely.
Let the caramel cool for a couple of minutes and then add in the butter chopped into cubes or slices.
Stir in the butter as it melts and once it has all melted and mixed together, pour it into the pastry case – you don’t need to wait for it to cool!
N.B – if you are unlucky, the caramel may split when you add the butter and you will end up with an oily layer on top. If this happens, let the caramel sit for a few minutes to separate out and then spoon off the oil that appears at the top.

Chop your chocolates and place in bowls – make sure the dark chocolate is in a large bowl as the others will be added at a later point!

Add 30g of butter to the dark chocolate, 20g to the milk chocolate and half a teaspoon of vanilla to the white chocolate.
Heat the cream until it’ just about to boil and then add 275ml to the dark chocolate, 150ml to the milk chocolate and 75ml to the white.
Let the chocolate stand in the cream for 2 minutes and then stir each bowl until it is filled with a smooth chocolate ganache.
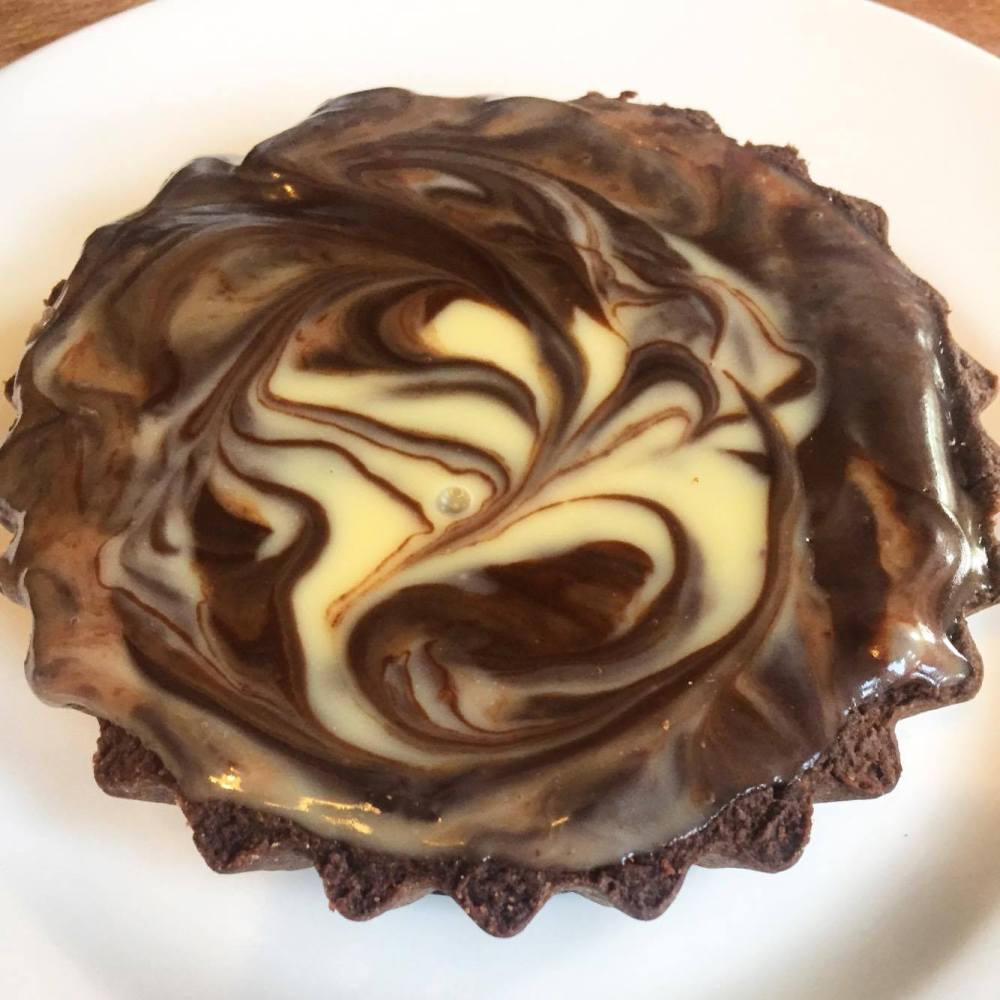
Take a little of the dark chocolate ganache and put it off to the side – this is for decorating later.
Pour the milk and white chocolate ganaches into the dark chocolate making sure not to scrape the bowl out as the leftovers in the bowls are used for decorating.
Use a skewer to mix the ganaches – BUT ONLY A LITTLE – you want the variation in ganaches inside the tart.
Pour the filling into the tart filling it but not quite to bursting!
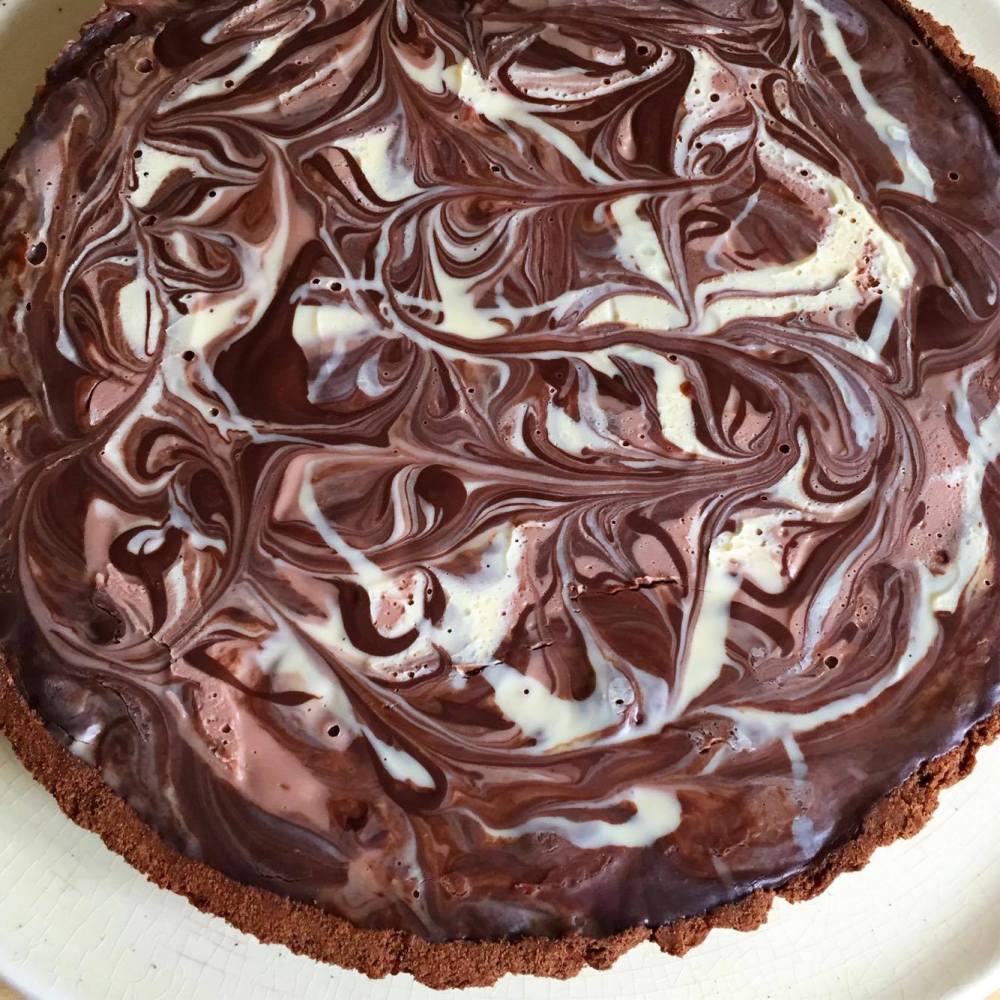
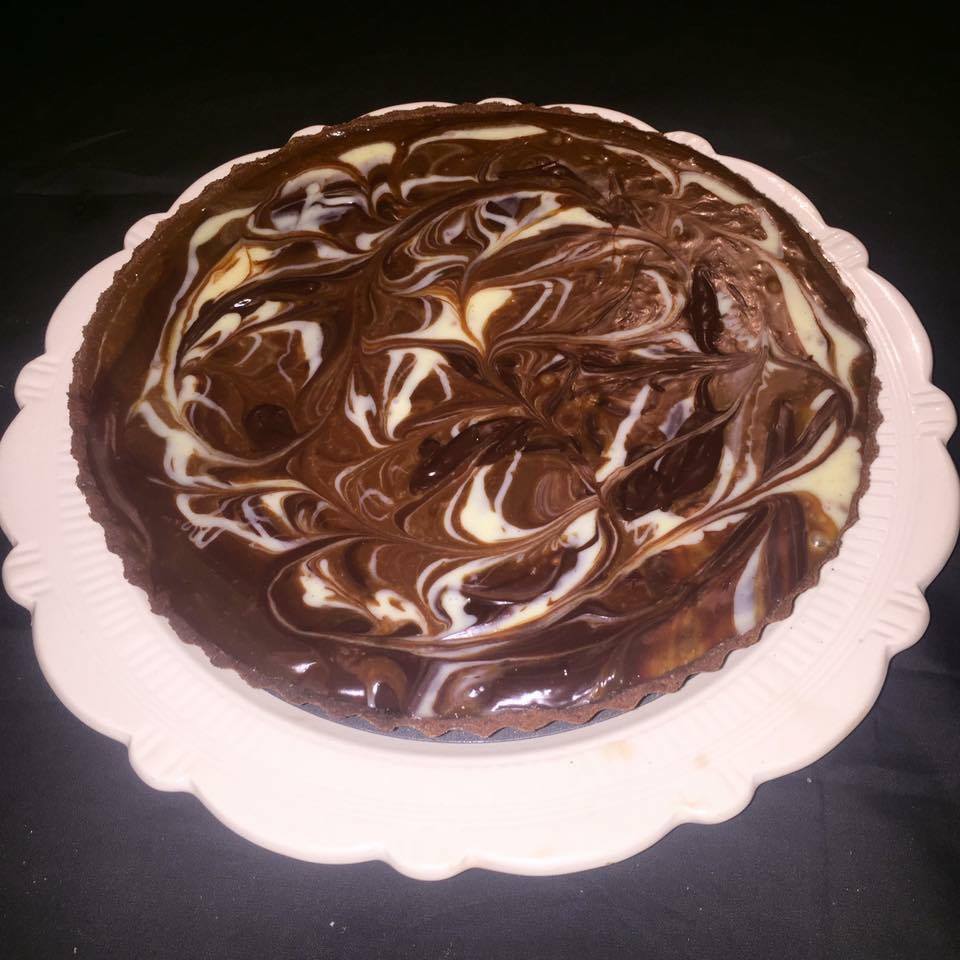
Use the leftover dark, milk, and white chocolate ganaches to spoon blobs and lines over the top of the tart.
Use a skewer to swirl the chocolate filling to give a beautiful and professional finish – don’t catch the caramel layer when doing this!
Let the tart set in the fridge for a couple of hours or even overnight to fully harden up.
When serving, place your knife in a jug of hot water and then wipe it off on a tea towel before cutting. This helps make the cuts incredibly clean and prevents the filling sticking to the knife too much.
Serve with a little cream and a selection of berries.
This is one of my favourite desserts and I hope it will be one of yours too! As an added bonus, this tart also freezes really well – assuming you have any left!
Let me know if you try this at yourselves and give me a tag on instagram (@thatcookingthing)! I love seeing what you guys create at home.
See here for the last recipe from my Baking series – the gooeyest chocolate brownies you can find or here if you fancy making a delicious dinner of homemade pizza!
Have a good one and I’ll see you next week with an exciting recipe for spiced turkey burgers. Fab for using up odds and ends and wonderful as a filling for other dishes too!
H

6 Comments Add yours