I was introduced to dumplings a few years ago by one of my best friends and housemate, Yan. I would recommend checking out her blog as she is a phenomenal cook. One time after visiting home for the weekend, she returned with a huge bag of homemade, frozen dumplings. Being the naïve person I am I assumed they were just like a Chinese version of ravioli – most cultures have some sort of meat wrapped in dough in their cuisines. My gosh was I wrong. Her mum’s dumplings were an experience that I have never forgotten.
It didn’t take long for Yan to suggest that we had a dumpling dinner day when we came together as a house and she taught us how to fold dumplings. I feel like I did very well out of this as the standard filling (and the one which Yan made) is pork based. As a result, I ended up making my own filling which was turkey based and there was a lot. Since then, I have experimented with different meat fillings and one tofu one – I primarily use beef and turkey. Coming up with an actual recipe for this post presented something of a problem as I usually eyeball the ingredients depending on how much ginger, garlic or chilli I am feeling like at the time.
The history of Chinese dumplings doesn’t specify the year when they first appeared but they seem to crop up sometime around 2000 years ago. They are traditionally boiled or steamed, however pan-fried ones have become very popular recently. These fried potstickers are crispy on the base and tender at the top. My favourite story of their origin is about a chef who was boiling his dumplings and took his eye off the pot. It boiled dry. Instead of starting again, he served up the dumplings and pretended that they were meant to be crispy on the base. The charade was so good that the eaters believed him and they enjoyed the contrasting textures so much that they requested the meal again. Since then potstickers have spread and nowadays are enjoyed all over the world.
Dumplings are great fun to make and are fantastic to do with friends – it not only speeds up the crimping process but gives you a chance to relax and have a nice chat or a catch up. I do not make them very often as I normally fold all the dumplings alone and I rarely have time for that, however when I can I love to make a batch and freeze them for a later date. I hope you enjoy them as much as I did when I first tried these dumplings.
Dumplings
Makes around 40 dumplings
Serves 3
Cost per portion: about £2.00
Time: 1.5 hours (wrapping 40 dumplings alone takes time but can be fun with a friend or even if you just put a film on in the background)
2-inch piece of ginger
3 garlic cloves
1 medium heat chilli (optional)
500g minced beef
One bunch spring onions/salad onions
1 tbsp dark soy sauce
1 tbsp sesame oil
Salt and pepper to taste
One pack dumpling skins
Optional
2 tbsp curry powder
1 tbsp chilli oil
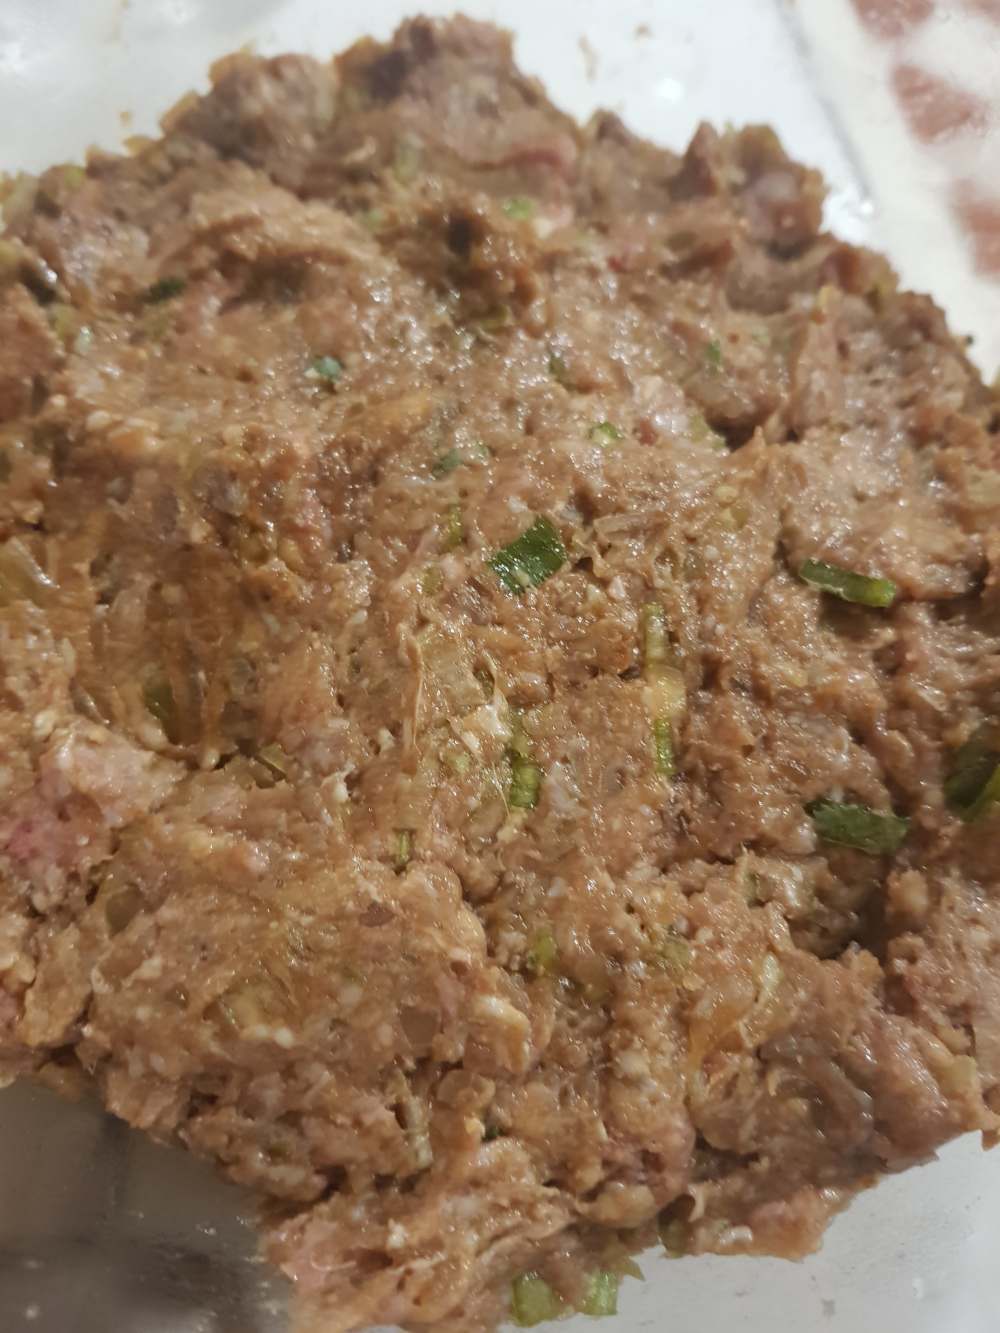
Peel the ginger and garlic. Finely chop both and place them into a large bowl.
Finely chop the spring onions, including the green part, and add them to the ginger and garlic.

If you want to add some spice, chop the chilli and add it to the bowl.
For curry dumplings or extra spicy dumplings, add the curry powder/chilli oil at this point.
Add the beef, soy, sesame oil, salt and pepper before mixing everything until it is fully combined. I tend to do this using my hands as I can feel when everything is mixed together.
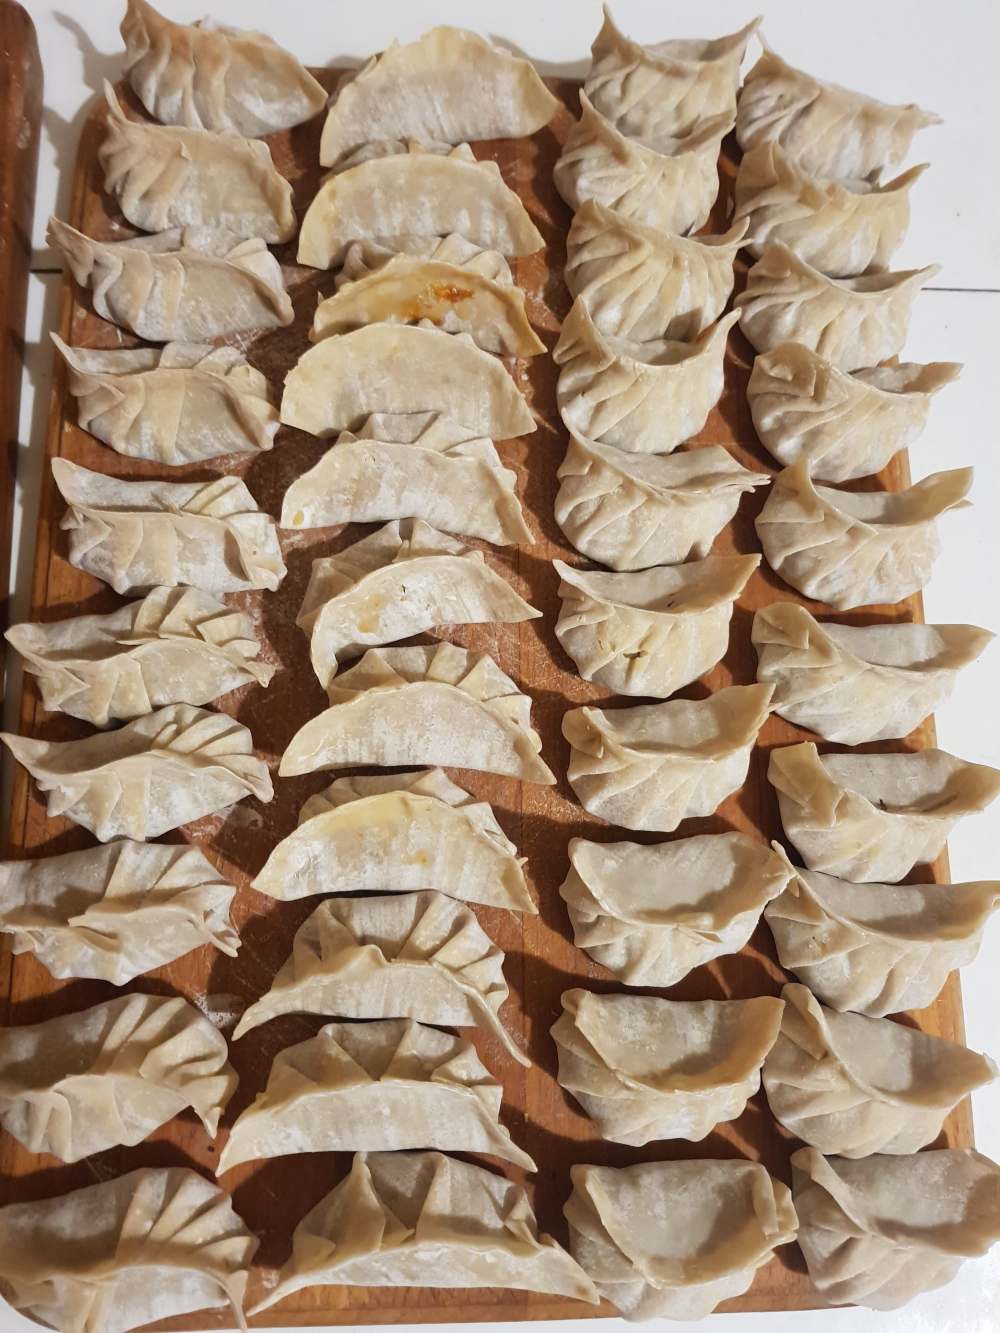
To make the dumplings, place a circle of pastry on a board.
Add a heaped teaspoon of filling to the centre.
Wet the edge of the wrapper and pinch to seal – this will make a very basic, uncrimped dumpling.
To crimp – I would recommend finding video tutorials as words and pictures will probably not do this justice but here goes (there are pictures of the steps below:
If you are right handed:
Make the filling paste into an oval
Pinch the wrapper at the edge of the oval using your left hand
Use your right thumb inside the dumpling to stabilise it and use your right and left index fingers to pinch together a second fold next to the first.
Fold this down and pinch it onto the uncrimped edge of the skin.
Repeat the crimping steps along the edge of the wrapper until you get all the way along.
As you crimp, the dumpling will start to curve around giving a crescent or half moon shape at the end.
Once you have finished crimping, go back over the edge and pinch together again to fully seal.
If you are left handed, just reverse the instructions above.

After you have mastered the basic crimping technique, you can start to play around with it and make different shapes for different flavours.
To cook, you can either steam, boil or pan fry the dumplings for around five minutes. I would not recommend trying to make these into potstickers as ultra-thin, shop bought skins do not stand up well to the different cooking techniques required to make good potstickers.
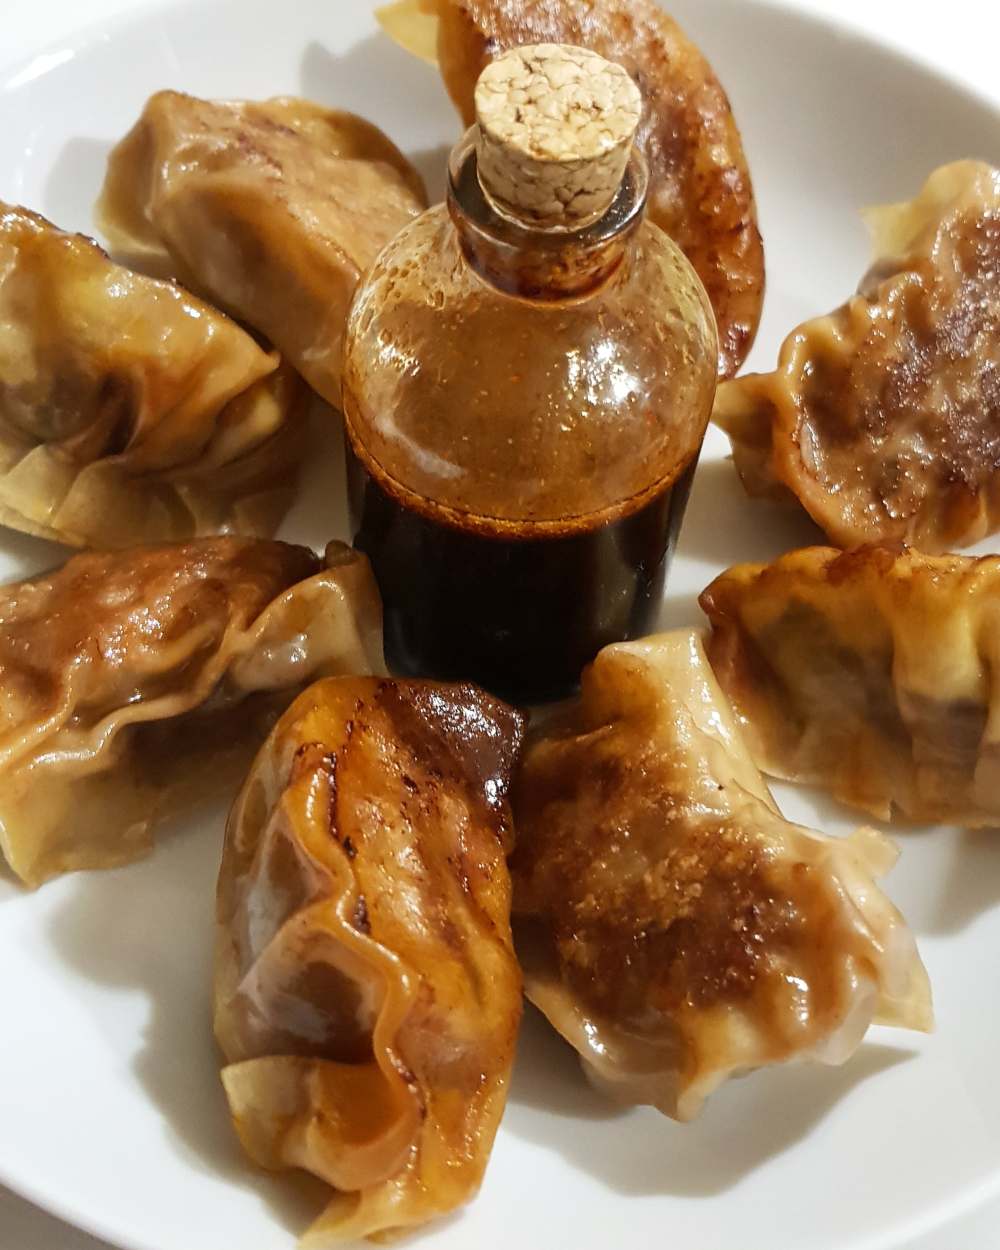
These are best served with a dipping sauce made from soy, sesame oil and rice vinegar. I also like to add sriracha for some extra heat. I would give a recipe for the dipping sauce but it is very personal so I would recommend experimenting until you reach a satisfactory taste. Another thing I would recommend is making lots of dumplings. You can eat far more than you think!

If you love dumplings, why not try my turkey filling? Any leftovers can be made into burgers for a separate meal. If you love Asian flavours but would prefer something a little less labour intensive, why not try my sticky salmon or my ginger tofu?
Have a good one and I will be back next week with a layered biscuit recipe.
H

Sounds and looks delicious to me!
LikeLike