I thought that I didn’t like custard tarts. It turns out that I was just unfortunate enough to have never tried these absolutely divine creations. A rich, cinnamon and vanilla egg custard encased in shatteringly crisp, flaky pastry turns out to be just thing to make you feel better after a stressful day… or anytime to be honest.
Pastéis de nata were born of convenience. Catholic monks at the Jerónimos Monastery used egg whites to starch clothes and, as you may imagine, they got through a lot of them. To avoid wasting the yolks, the monks baked them into cakes and pastries. In an attempt to earn some money to prevent their monastery being closed the monks joined with the local sugar refinery to sell small custard tarts. The monastery still closed (in 1843) and the recipe was sold to the owner of the sugar refinery who opened the Fábrica de Pastéis de Belém in 1837. Their descendants still own the patisserie to this day which is where the Pastéis de Belém, an alternative name for the pastries (but only when sold from this specific shop), can be bought.
There are two things which stand out to me about the Pastéis de nata separating it from the level of mediocraty that most custard tarts inhabit and both of them are to do with the pastry. Firstly, the pastry is a soft lamination. That is to say, the butter is not kept super cold like in classic puff pastry but is instead so soft that you can easily spread it on a very fragile dough. Secondly the lamination in the final product is vertical.
By using soft butter in the pastry, the lamination is far less pronounced than it would be for a classic puff pastry. The definition between the layers isn’t as strong because some of the softer butter is absorbed into the pastry while it is being rolled. This creates a texture which is somewhere between standard puff pastry and Danish pastry dough. The ultra-high oven temperature causes the pastry to cook very quickly resulting in a super crisp exterior and ensuring that the pastry is fully cooked despite no blind baking and only a short baking time. This also prevents the butter melting into the pastry in the oven as the flour begins to cook before it can absorb any more of the fat.
The direction of the lamination has a distinct effect on the final product. Where normal puff pastry has horizontal layers, the Pastéis de nata dough has vertical ones. This means that it expands horizontally in the oven, outwards and not upwards, which prevents it forcing the filling out and spilling. It also gives a far more beautiful final result as the lamination in the pastry walls of the tart is far more prominent than if a standard puff pastry had been used.
I know they are a bit of a faff to make but I guarantee that these pastries are 100% worth it. Let me know how they go for you!
Pastéis de Natas
Makes 24
Cook time: 15-20 minutes
Prep time: 45 minutes
Rest time: at least 4 hours
Ingredients:
270g flour
200ml water
Pinch salt
250g very soft butter
6 egg yolks
250ml + 60ml milk (the creamier the better, but don’t use actual cream!)
3 tbsp flour
265g sugar
150ml water
1 cinnamon stick
1 tsp vanilla extract
To make the pastry:
In a stand mixer:
Put the flour, water and salt into the bowl of a mixer with the dough hook attachment.
Mix and knead with the stand mixer until the dough forms a very soft bowl and starts to come away from the sides of the mixing bowl.
Heavily flour a surface, tip the dough onto it and coat in flour.
Wrap in cling film and leave for at least fifteen minutes.
By hand:
Stir the salt into the flour and pour in the water.
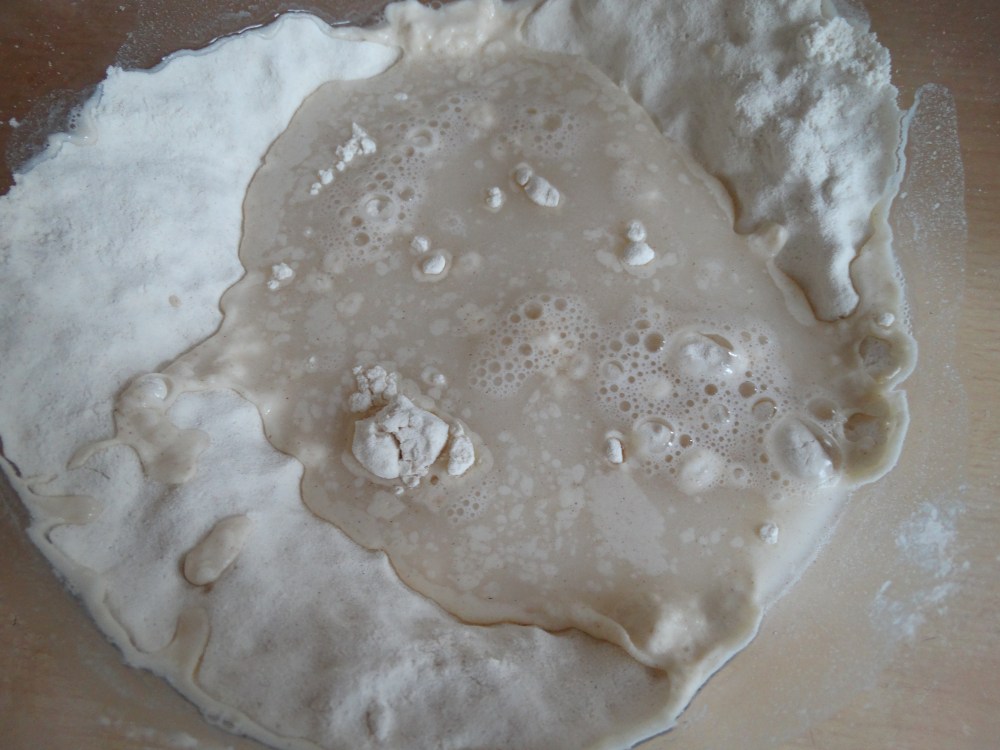
Using a wooden spoon, mix the ingredients until they are combined and form a very soft dough.
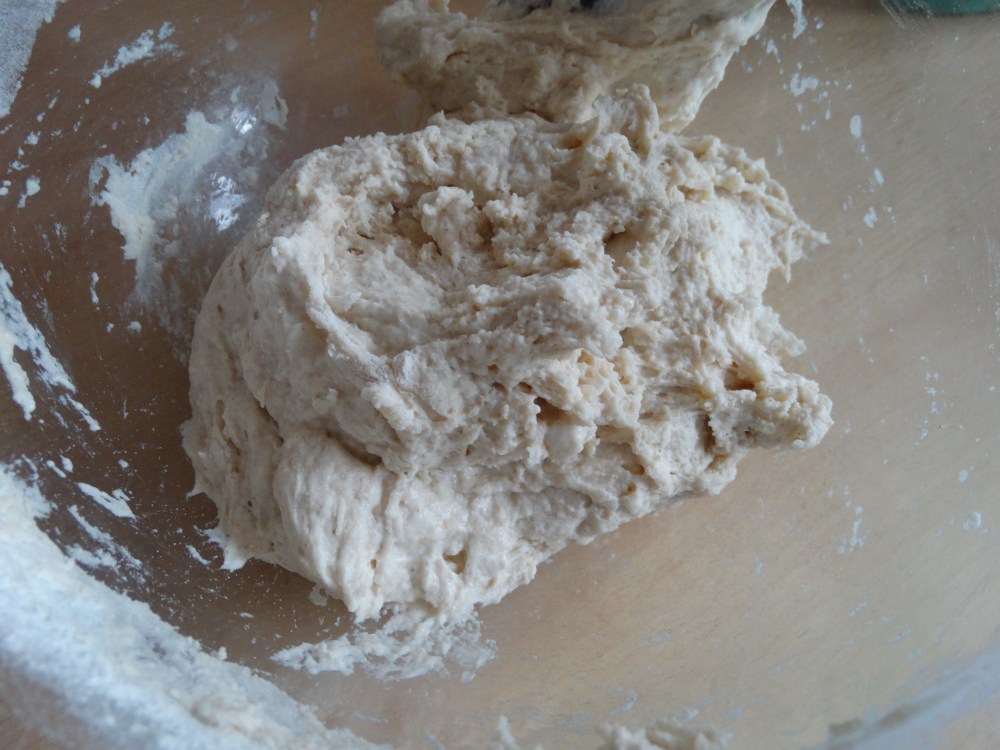
Tip onto a surface and use a pastry scraper to help stretch and knead the dough. DO NOT ADD MORE FLOUR.
Once the dough begins to get more elastic and less sticky (around ten minutes), coat it in flour, wrap in plastic and leave to rest for at least a quarter of an hour.

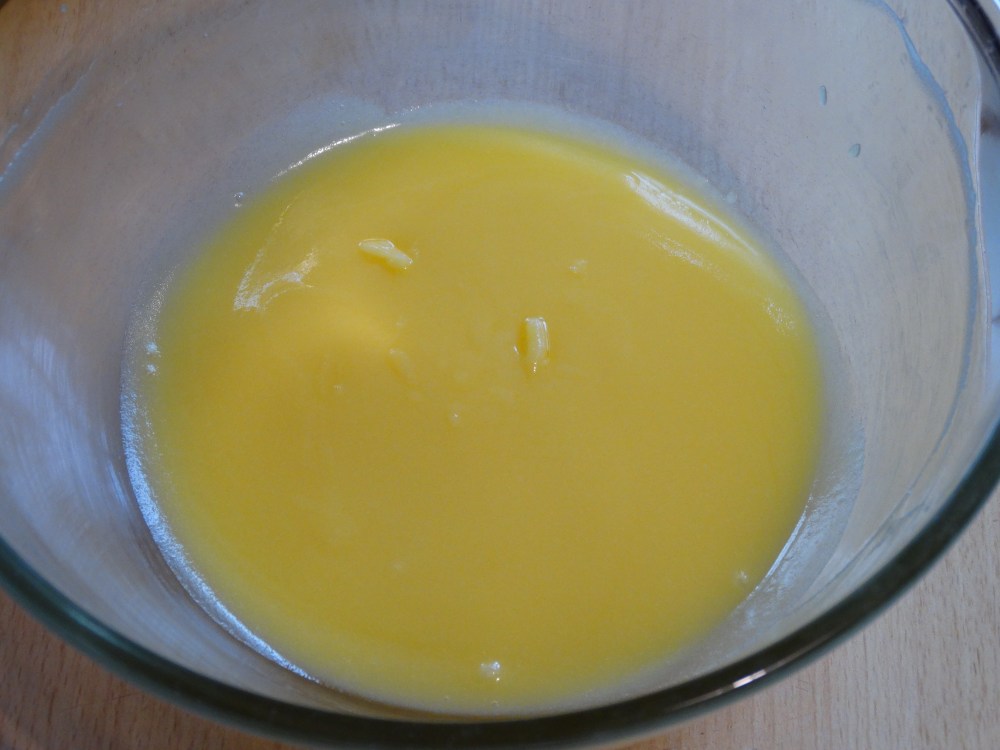
If your butter is not super soft, heat it gently in the microwave, for ten seconds at a time until it begins to soften. Make sure to stir between each heating to ensure that it doesn’t fully melt anywhere. Make sure the butter is very soft before setting aside.
Generously flour a surface and turn out the dough.
Roll it into a rectangle about 18”x12”.

Take one-third of the softened butter and spread it down two-thirds of the length of the dough. Do not spread it all the way to the edges.

Fold the unbuttered third of the dough across and then fold the opposite side on top to create three layers. Gently press the edges to seal.
Rotate the pastry through a quarter turn and reflour the surface if necessary. The pastry is super soft and sticky so don’t be afraid to use a lot of flour at this stage.
Roll it out again into a rectangle and repeat the folding instructions with another third of the butter (half of what is left).
Rotate, roll and old again using the remaining butter.
Roll out the dough into an 20”x18” rectangle.
Roll it up into a tight log starting at the closer side to create a spiral of lamination.

Wrap the dough up and refrigerate for at least four hours and preferably overnight.
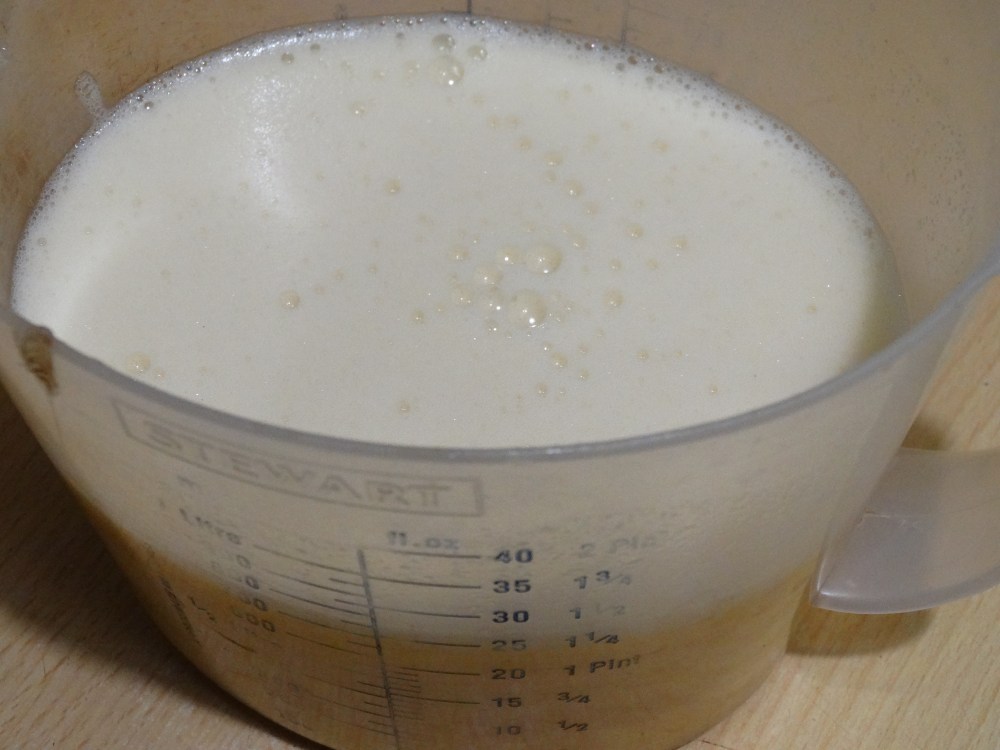
To make the filling, whisk the 60ml portion of milk into the flour in a large bowl.

In a heavy based pan, add the sugar, water and cinnamon stick. Heat to dissolve the sugar and bring to the boil without stirring. Leave for one minute.


While the sugar is dissolving, scald the remaining milk. This is done by bringing it to the boil in a separate pan.
The moment the milk boils, take it off the heat and pour it into the flour and milk mix whisking constantly.
Once the sugar syrup has boiled for a minute, take it off the heat. Remove the cinnamon stick and like the milk, pour it in a thin stream into the flour mixture, whisking constantly.
In a large bowl, whisk the egg yolks to break them up.
While continuing to mix, pour in the milk and sugar syrup mix in a thin stream. This is very hot and you want to avoid cooking the eggs and causing them to scramble.
Once the eggs are incorporated, stir in the vanilla extract.
Strain the filling mixture into a jug, cover and leave to cool.
To assemble the tarts:
Preheat your oven to 260°C (500°F) or the highest setting (this tends to be around gas mark nine which is 230/240°C).
Lightly butter a 12 pan cupcake tin.
Remove the pastry from the fridge, cut in half lengthwise and place half of it back into the fridge.
If the ends aren’t straight, you may have to trim them.
Cut the log into twelve rounds and place them into the tins with the spiral of lamination facing upwards.
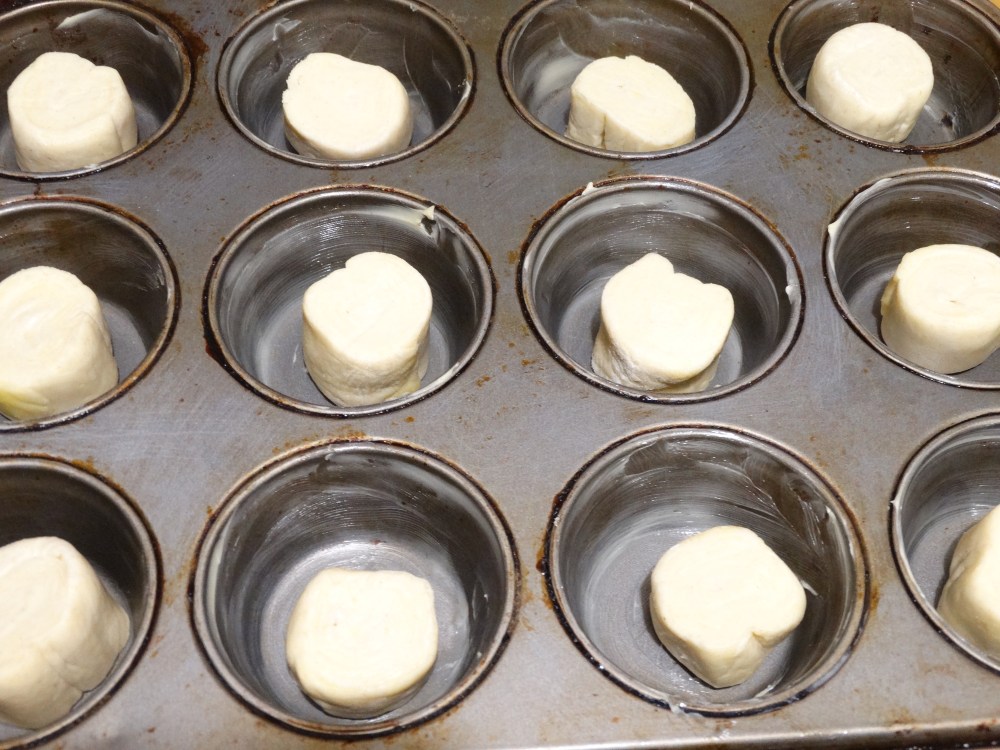
Leave for fifteen minutes to soften.
Fill a small ramekin with water as you will need wet fingers for the next bit.
Using wet thumbs, gently flatten the centre of each piece of dough – do not flatten the edge, you want a sort of well shape.
Moving outwards, gently squash the dough into the shape of the tin coming about three quarters of the way up the side (there are plenty of videos online which will show you how to do this properly).
Use half of the filling mixture to fill the cases about 75-80% full.

Bake for fifteen to twenty minutes, turning at ten minutes, until the top of the tarts has blistered to dark brown is several places. You don’t want them to be fully dark brown all over but you also want a bit of colour.
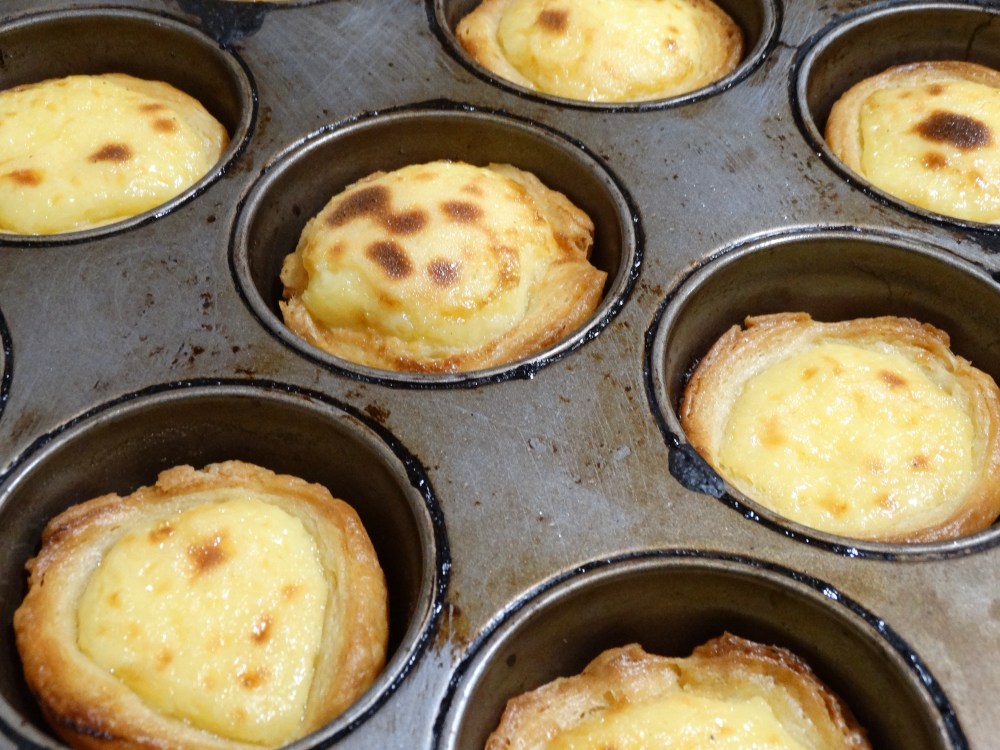
Take the tarts from the oven and let cool for five minutes before removing from the tin.

These are best served still warm from the oven (but not boiling hot) and sprinkled with a little bit of icing sugar and cinnamon. The filling is delicious and the pastry is stunningly crisp. The pastry will stay crisp for about 48 hours but soften over time.
Store in the fridge where possible!
I hope you enjoyed the recipe. If you are a fan of flaky and puff pastry, be sure to check out my recipe for it – I promise that it isn’t as hard as it seems. You could even use your puff pastry to make salmon en croute or Beef Wellington.
Have a good one and I will be back next week with a recipe for a delicious roast dinner with an obscene amount of garlic. It’s wonderful.
H

Reblogged this on Crackling Pork Rinds.
LikeLike